Introduction
If you love the outdoors and automotive adventures, off-roading is a natural extension of both passions. Modifying vehicles to navigate remote backroads and crawl over challenging obstacles isn’t necessarily a new concept, but the idea of developing rugged, mobile base camps for launching hiking adventures gained new attention in the 2010s in the form of overlanding.
Central to overlanding is the idea that backcountry adventures can be accomplished through self-reliance on a vehicle—one that can take you to places that may not be accessible to most. For an avid backpacker and hiker, it’s another tool in the arsenal of gear that helps get you to your destination. While an expedition is defined as a journey with a specific purpose, overlanding views the journey itself as the purpose.
Meet “Clearance Clarence”
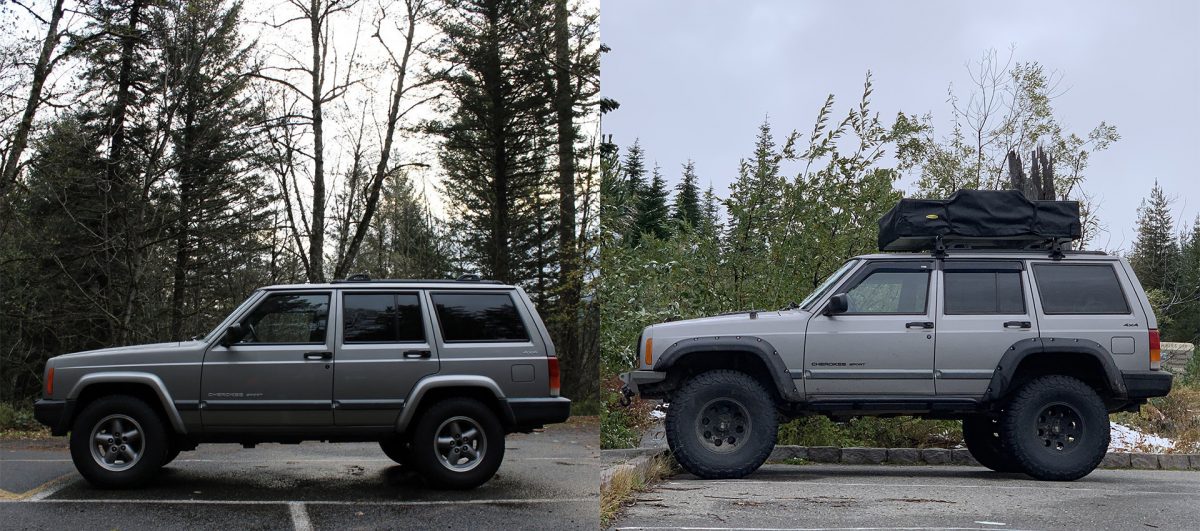
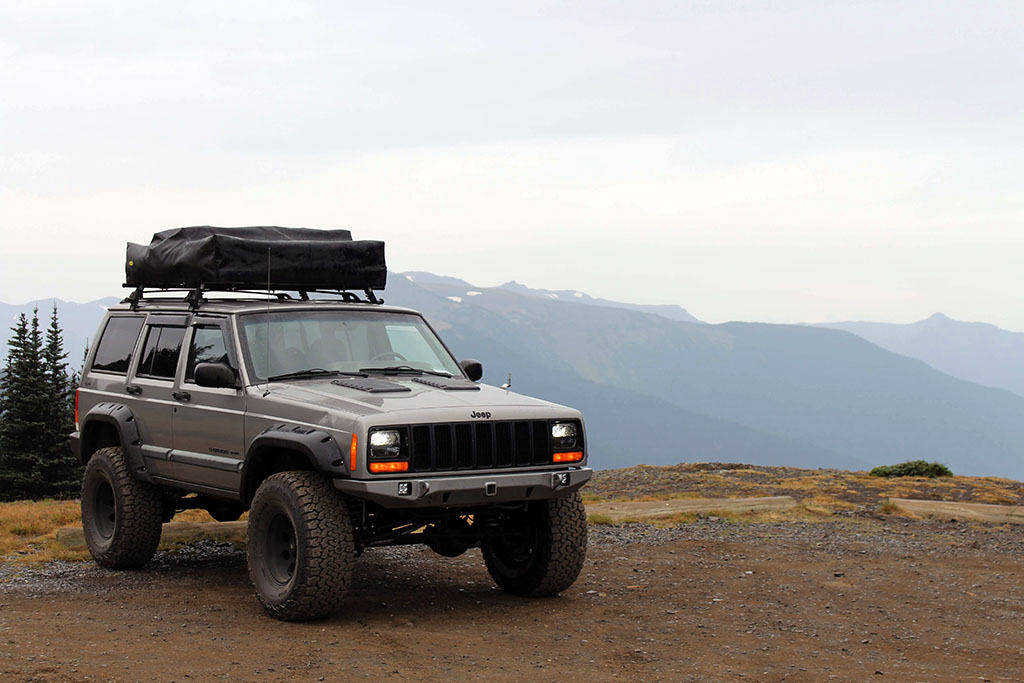
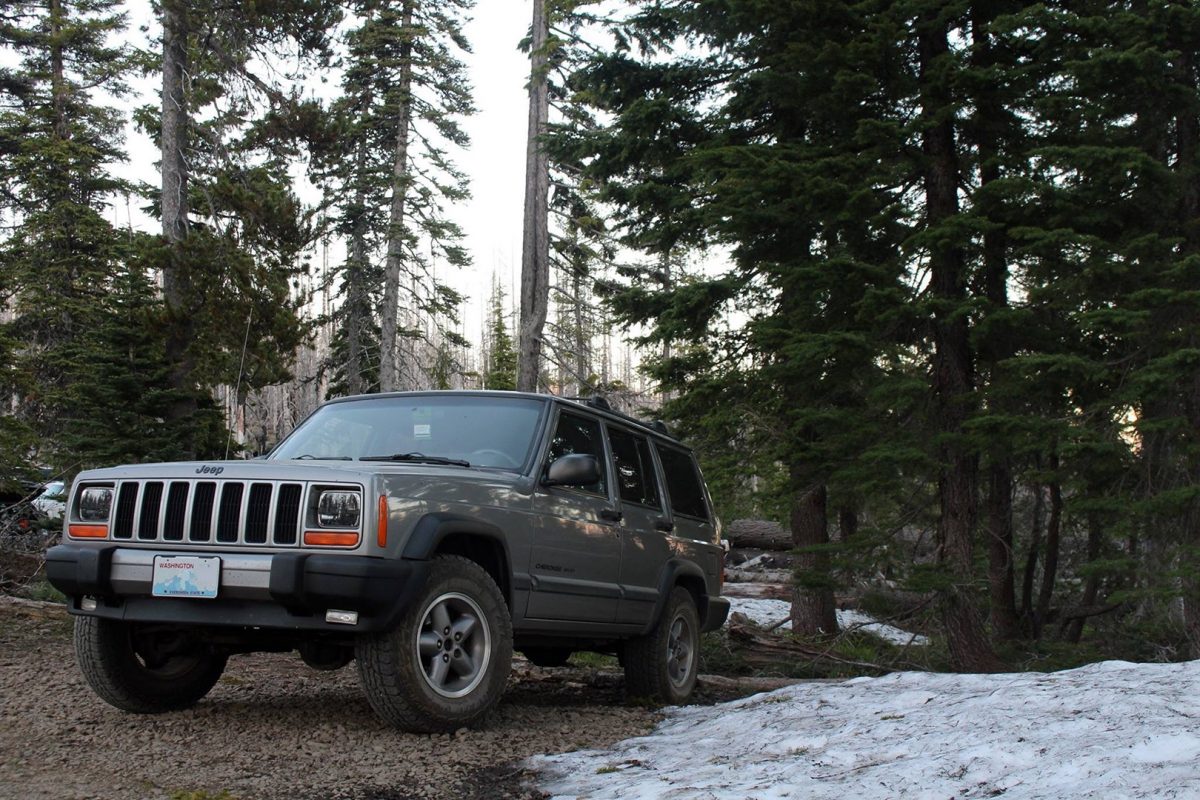
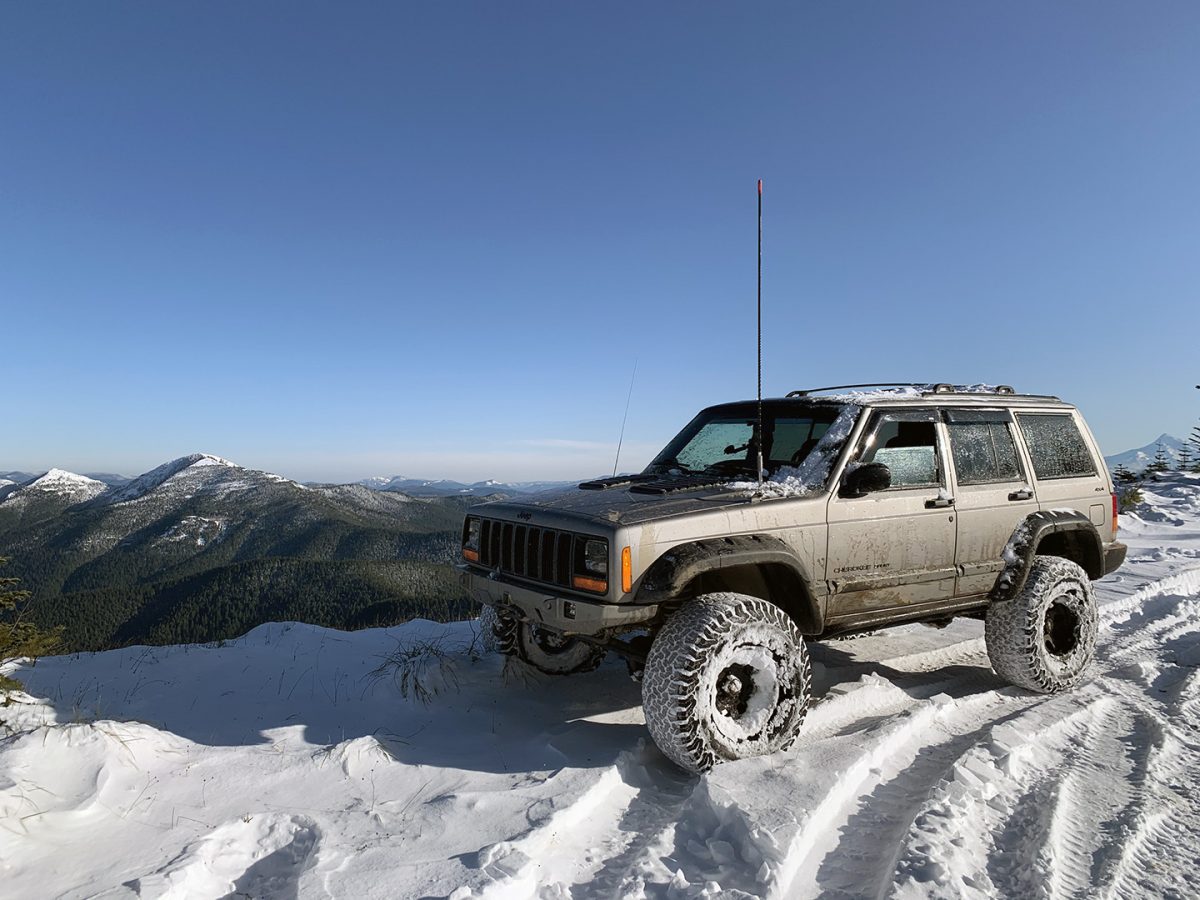
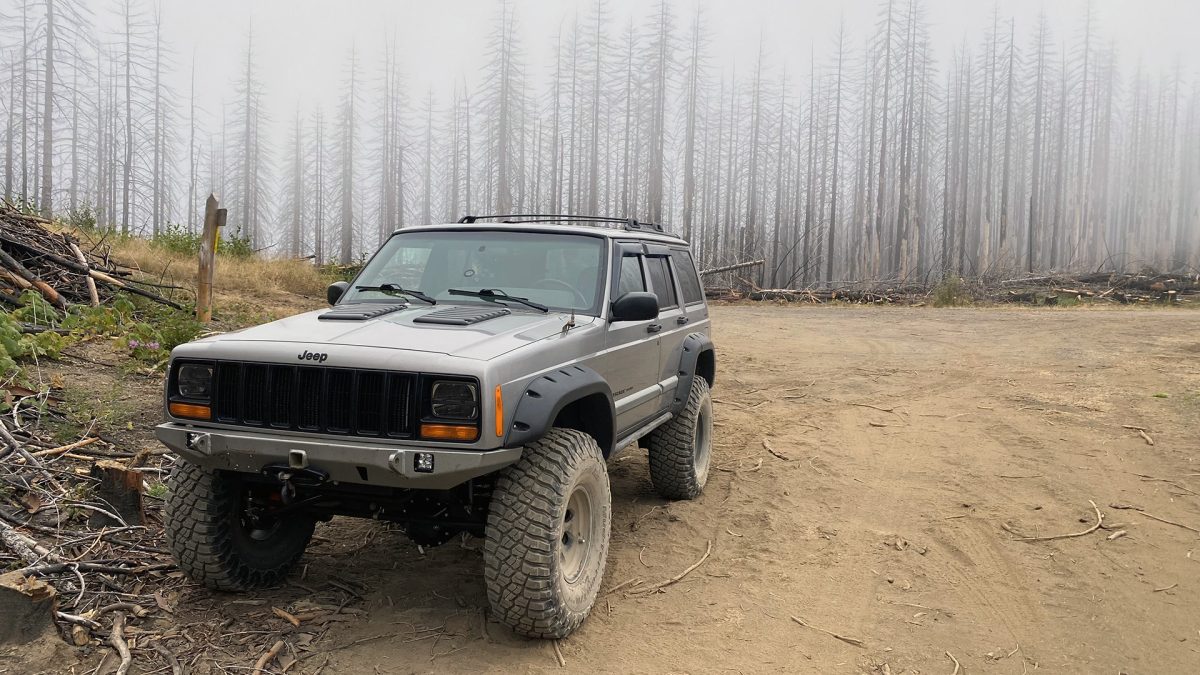
This is the story of “Clearance Clarence,” a 2001 Jeep Cherokee XJ.
There are a lot of XJs out there—during its 18-year production run, Chrysler built nearly 3 million of them. Some became rock crawlers, mud boggers, forste road runners, and many are still mostly stock to mildly modified adventure rigs. While I’m certainly not the first to document the trials and tribulations of building and fixing a Jeep, the XJ is a platform that has captured the imagination of many, and each build takes on the character of its owner.
My Goal
My goal was to create a well-rounded, dependable, and durable off-road machine capable of long-distance on-road trips to all the great hiking spots in and around the Pacific Northwest—and maybe a few of the harder-to-reach ones.
Why the Jeep Cherokee XJ?
In the off-road community, this little sport utility vehicle set a new standard for affordable 4×4 adventuring in the 1990s and early 2000s. When I was looking for a dependable, tried-and-true platform to build into a capable trail runner, there were many great nameplates to choose from—produced by Toyota, Jeep, Nissan, Ford, Subaru, and others. However, the Jeep Cherokee XJ stood out for several reasons:
Affordability
In my area (Pacific Northwest), you could buy two or three bone-stock XJs for the price of one stock 4Runner. I picked up my 2001 Jeep Cherokee with 231,000 miles for $3,000 in 2016.
Capability
Out of the box, you get a low-range transfer case, straight axles front and rear, and a near-bulletproof drivetrain with the 4.0L straight-six motor and AW4 automatic transmission.
Extensive Aftermarket Support
Jeep is a huge brand in the United States. Even after production of the XJ ended in 2001, vendors have continued to manufacture parts for these trucks. Suspension, drivetrain, brakes, tires, wheels, bumpers, and armor can all be acquired easily and affordably for the XJ.
Community Knowledge
The internet offers a wealth of good (and bad) information about cars. The Jeep Cherokee has such an enormous following that almost any issue you encounter has already been experienced, fixed, and documented by someone else. Everything from replacing rear main seals to fitting a snorkel to axle swaps has been covered.
DIY-Friendly
Most upgrades can be done with basic hand tools at home, in your garage, with the cliché beer in hand. I am not a mechanic, but working on this truck is like playing with Legos. Do a quick search, and you can probably find someone who documented a build to turn their Jeep into a submarine.
Modifications
It wasn’t long before the basics were taken care of, and I started noticing little things that could be improved. Here’s a list of the modifications I’ve performed:
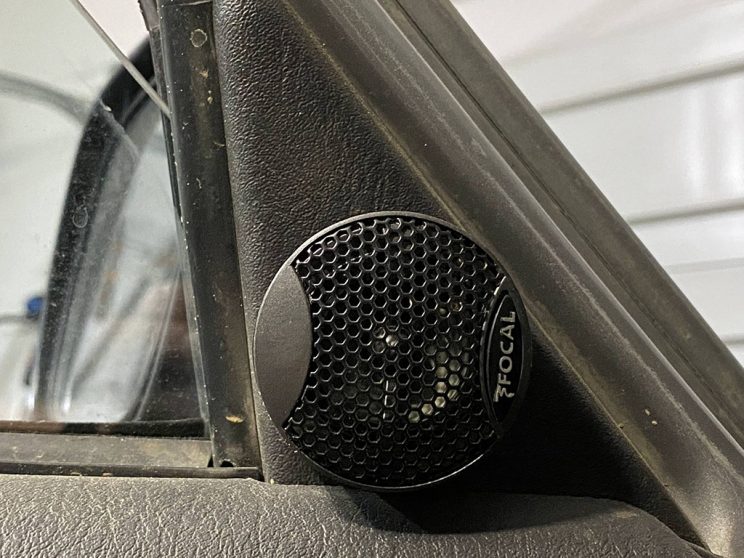
In the front I installed the Focal Integration ISS 130 5-1/4″ component speaker system. These speakers fit the stock door mounts and were installed with XTC 5-1/4″ shallow depth speaker baffles to reduce vibrations and protect the back of the speaker.
Since tweeters were a rarely selected option in the Cherokee, they had to be custom mounted in the plastic trim piece in the door located directly behind the side mirrors. This is fairly straightforward to do and requires very minor drilling.
In the rear I installed Focal RCX-130 Auditor Series 5-1/4″ 2-way speakers. In my configuration the rear speakers have mounts which are molded into the roof panel.
For bass, I originally installed an Alpine SWA-12S4 BassLine series 12″ 4-ohm subwoofer in a BassWorx wooden enclosure. The level of bass this setup generated was adequate, until it was stolen…
This was later replaced by an Alpine SWA-10S4 BaseLine series 10″ 4-ohm subwoofer in a stealth enclosure by SubThump specifically designed for the cubby area in the 84-01 Jeep XJ. The level of bass this setup generated was on par with a soggy fart muffled by an old box spring mattress.
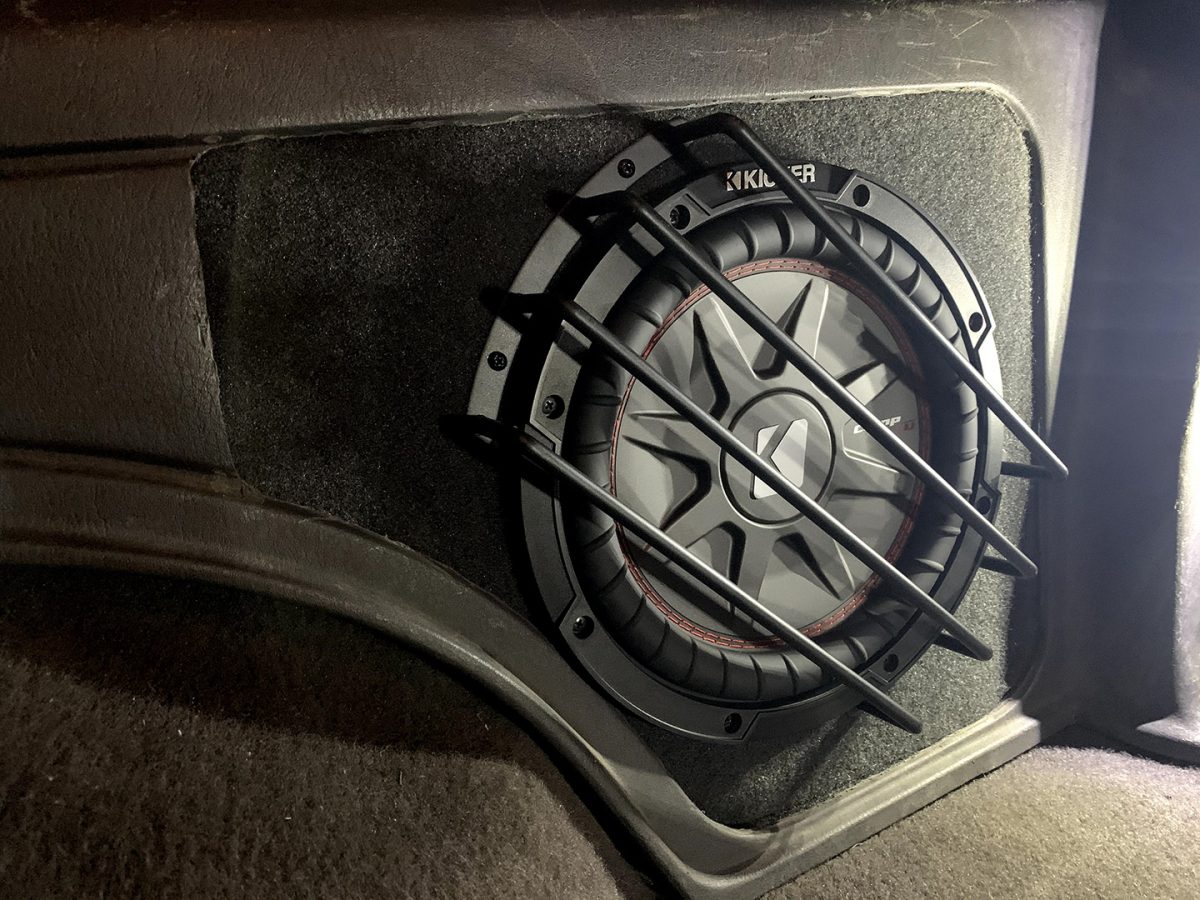
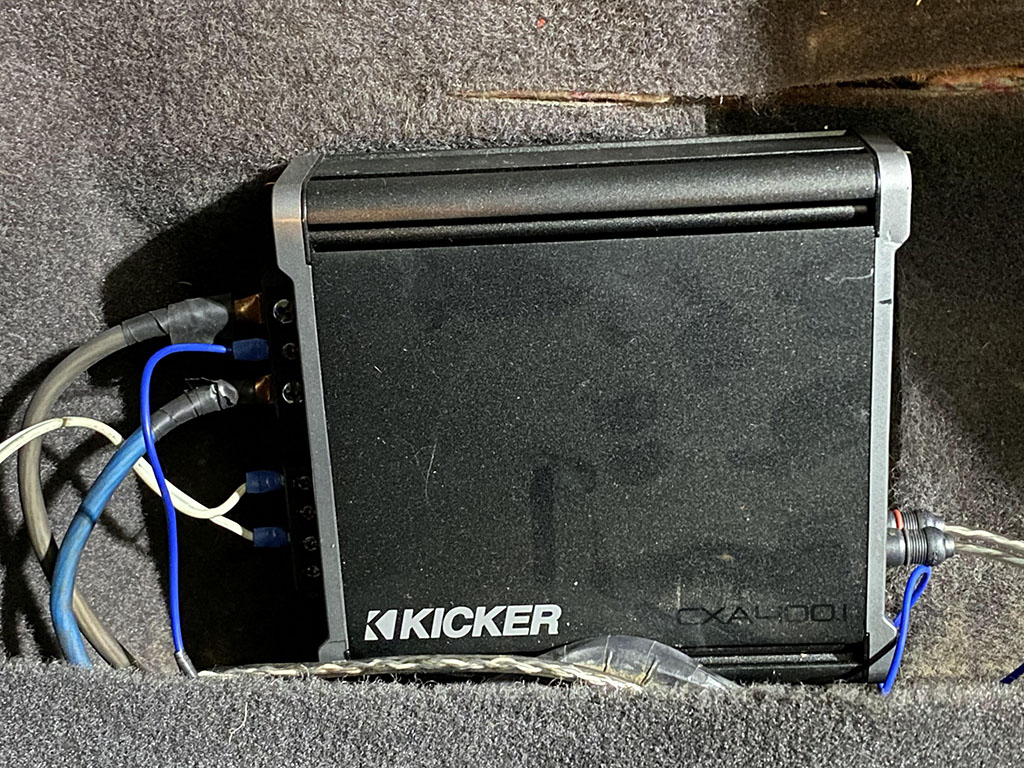
After doing some research I realized that this enclosure needed a shallow mount sub that was better matched to the power output of the amplifier. Because: science. That’s when I discovered the Kicker CompRT 10″ 2-Ohm. After some tuning this sub slaps hard enough for my musical tastes. It is not the kind of ‘feel it in your chest’ bass that will rattle the car frame and shake the neighbor’s kitchen windows, but it will put a smile on your face and add soul to a song.
Because this Jeep goes out on frequent adventures and gets lots of stuff piled in the back I wanted to protect the sub from things falling into it and potentially damaging the cone. The black metal bar-shaped grill shown in the picture above works perfectly.
Powering the front and rear speakers is an Alpine KTP-445U amplifier. It’s small, compact and is easily hidden from prying eyes. Mine is mounted behind the dash so that it’s secure and out of the way.
After a disappointing run with an Alpine MRV-M250 Mono V-Power amplifier paired first with a 12″ sub and then a 10″ sub I upgraded to a more powerful Kicker XC400.1 400 watt mono amp. It’s roughly the same size as the Alpine MRV-M250 but delivers MO POWAH.
- Bushwacker Fender Flares
- Issue: The factory-sized wheel wells on the Cherokee are not conducive to larger sized tires. Many people will either estimate their lift to clear the tire size that they want to fit or cut & fold some or all of the fender for more clearance or both. In my case, I wanted to fit 33″ tires with a 4.5″ lift and minor trimming. The other variable was that the width of my tires would be 12.5″ on a 15″ rim with 4.5″ backspacing which meant they would stick out from the Cherokee’s body a few inches, creating a roller-skate look.
- Solution: In some regions this tire spacing may actually be illegal for street driving, for me it was a personal choice to have a wide body look. However, having wide fender flares can also protect your vehicles paint from debris that is kicked up by the tires. For my build I felt that is both a functional and aesthetic improvement to add Bushwacker’s high quality cut-out fender flares.
- Iron Rock Off Road – Rock Sliders
- Issue: The soft underbelly and sides of the unibody Cherokee are particularly vulnerable to damage from stumps and large rocks.
- Solution: Adding a sturdy pair of rock sliders is a pre-emptive to avoid any significant bending or structural damage from any of the larger piece of debris that the Cherokee will be crawling over. A well engineered set of rock sliders will also increase the rigidity of the center of the vehicle.
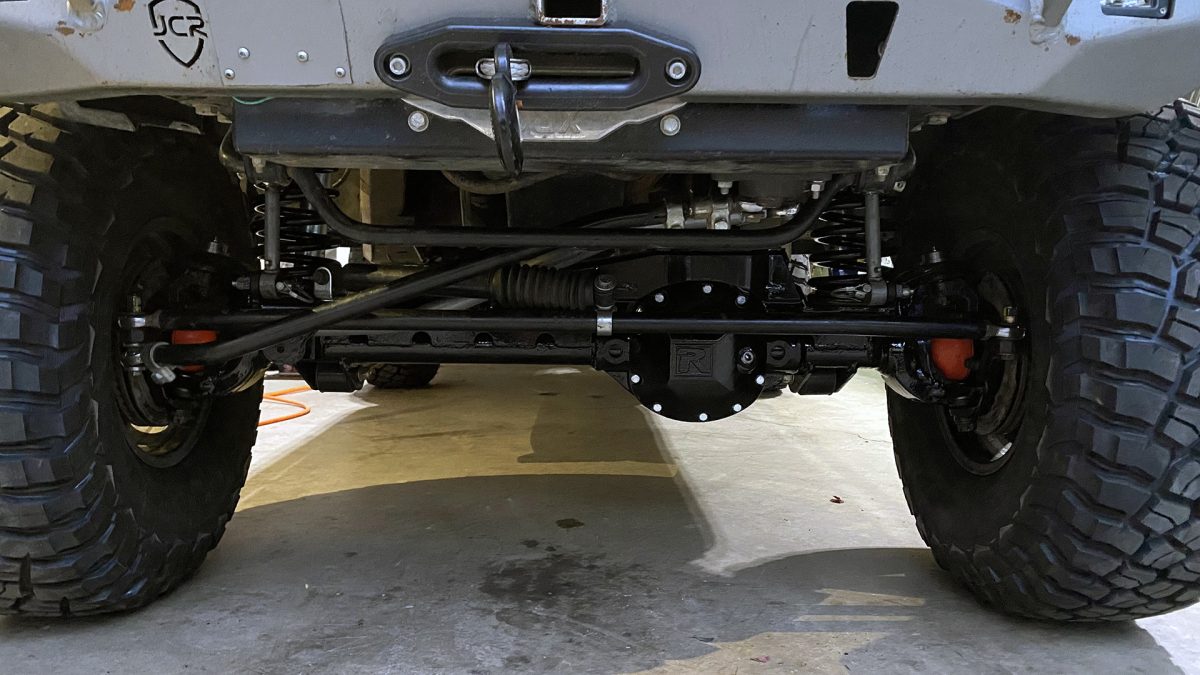
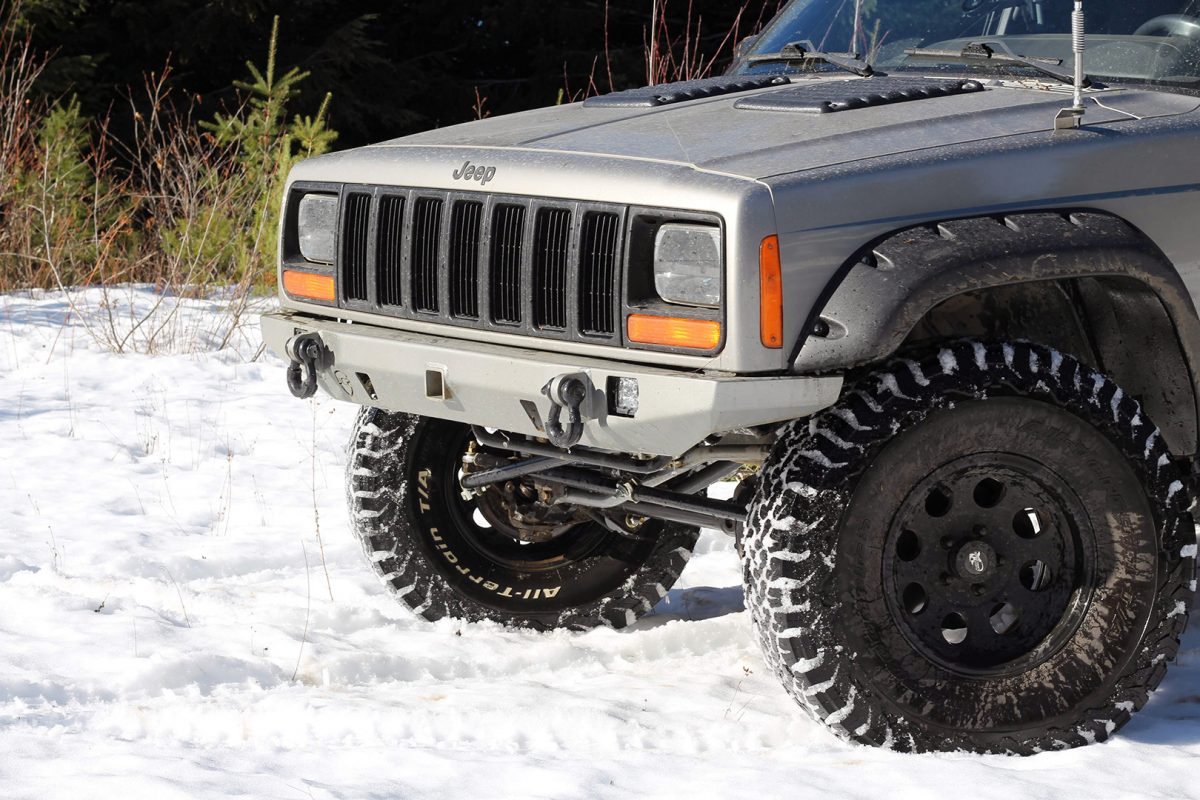
- Front bumper: JCR Offroad Crusader in bare metal with 2″ built in receiver + JCR unibody tie-in kit with steering spacer
-
- Issue: The stock front bumper is a combination of plastics and thin sheet metal. It’s designed to be light-weight and, with the lower plastic molding, deliver a slight aerodynamic advantage to the front of the vehicle. To the annoyance of the off-road community the stock XJ platform did not come with front recovery points which is a weakness that most modifiers fix with a sturdy front bumper.
- Solution: JCR’s Crusader bumper is one of the cleanest designs on the market for the XJ Cherokee and is designed to be practical and functional. With a 3/16″ thick steel structure and two 3/4″ shackle tabs the Cherokee’s frame will bend before this bumper does, which is why JCR highly recommends getting the unibody tie-in kit with steering spacer to re-enforce the connecting points that this bumper bolts to. As an added bonus there are also cut outs for 3×3 LED cube lights and hi-lift jack points.
- Paint: To prep and paint the bumper ERA Paints offers a kit that can be color matched to your vehicle. The kit includes primer, base paint (PS5 Silverstone Metallic for my project), clear coat, gloves, tape, wipes, sandpaper, wax/grease remover, and a handheld spray nozzle.
- Napier Precision Products – Hood Vents
- Issue: Engine bay ventilation and heat soak become concerns when you start adding weight to a vehicle. The Cherokee’s engine and cooling system were designed for on-road travel and light-duty off-road use. I was also battling fuel injector vapor lock after extended or heavy use and with the Cherokee’s hood design all of that heat just gets trapped in the engine bay.
- Solution: The LeBaron-style vents allow hot air to escape through the top of the hood from over 11 square inches of ventilation per vent.
- Front and Rear Window Rain Deflectors by Rugged Ridge
-
- Issue: Ever been on a back road in the middle nowhere in a rain storm in your vehicle? Your buddy pulls up next to you, rolls down his window and you do the same. Now you sideways rain pouring on to your lap. No bueno.
- Solution: With this kit you can easily adhere a set of tasteful deflectors to your doors to shield most of the elements from getting inside. This setup also allows for added security when you keep the windows cracked to allow for additional ventilation during scorching summer days.
- Plasti-dipped fender molding, plastic trim, badging, and logo pieces
- Issue: Over time this plastic looses its blaaack-ness and begins to fade, leading to that old Fisher Price toy look.
- Solution: Do this with trim paint. I used black Plasti-Dip which is frowned upon but it worked surprisingly well for my application. Over the last 3 years there are only the tiniest signs that it’s beginning to wear around the edges.
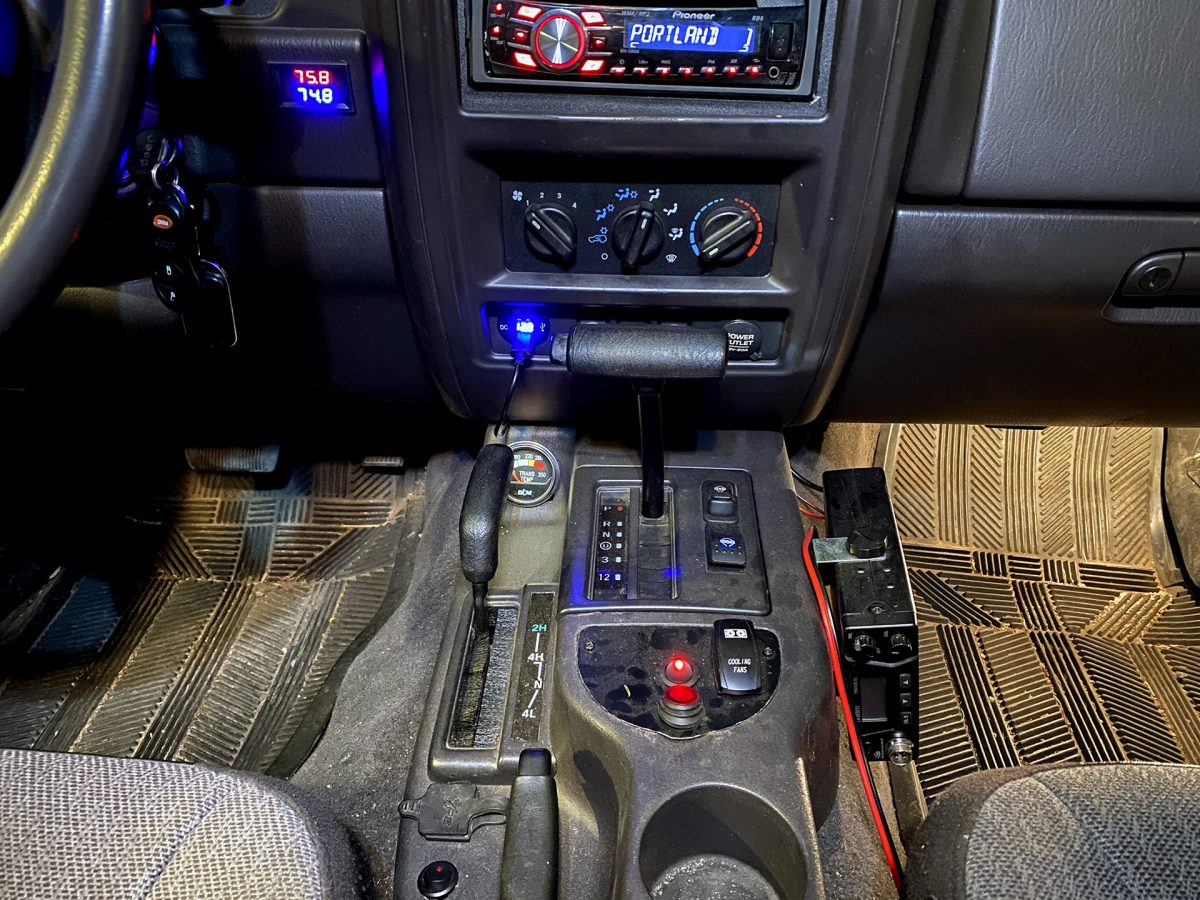
- Uniden and Firestik CB Radio Setup
- Issue: “Hey! Stop-you’re-about-to-back-into-” *crunch* This is why it’s important to have clear 2-way communication between vehicles.
- Solution: CB, or Citizen Band, radio has been around for a long time. Today, it’s a cheap and easy solution for mobile communication.
- Radio Unit – Uniden PRO505XL – Cheap, functional, compact & comes with all the hardware needed to mount anywhere in the Jeep.
- Antenna – FireStik FS-4BK 4 (r) li Fs Series 900 watt – A high quality 4 foot tunable antenna for CB radios. I can transmit and receive a clear signal even to folks with smaller antenna setups.
- Extended coax cable – FireStik K-8R9 9 foot Fire-Flex coax cable with Fire-Ring – You will need this cable if you want an externally mounted antenna.
- Mount – I needed the antenna to be both flexible and easily disconnect-able which required the following components:
- FireStik SS-174 Hood/Trunk Channel Mount – Installs nicely between the gap in the hood and the fender.
- FireStik K-1A Push-n-Twist Quick Disconnect – Integrates with the channel mount and provides a solid base for the antenna connection.
- FireStik SS-3H Heavy Duty Stainless Steel Antenna Spring – The final piece of the antenna setup. This springs provides the flexibility needed to bounce off tree limbs and branches without damaging any of the connected components.
- SWR Meter – Workman SWR2T – Required for tunable antenna setups to properly dial in your CB radio setup and to avoid damaging the radio unit itself. Do yourself a favor and either borrow one of these from a friend or purchase one to ensure that your radio is tuned properly.
- High Pinion Dana 30 axle from a 1998 Jeep Cherokee
- Issue: My non-mechanic understanding is that the low pinion differential design is an inherently weaker ring & pinion setup. Cherokees from the 90s had high pinion (HP) Dana 30 front axles – my 2001 had a low pinion. The rumor is that Jeep knew the Cherokee XJ model was being discontinued and were putting low pinion Dana 30s under Cherokees around 2000/2001 because… reasons.
- Solution: With my goal of running 35″ tires, but not wanting to swap to a larger axle, building a HP Dana 30 seemed like the direction to go with a few strength enhancements… okay, I maxed out the upgrades to this axle. See below.
- Dana 30 Over Axle Truss + HD Lower Control Arm Mounts
- Issue: The stock Dana 30 can take some abuse but I wanted bullet proof.
- Solution: This particular truss design was what really caught my attention. It’s very well thought out and the laundry list of beefy upgrades and special features with this truss is lengthy. I encourage you to take a look at Iron Rock Offroad’s site for more details.
- Dana 30 Inner Axle Sleeve Kit
- Issue: Probably unnecessary but… if I’m stripping the axle all the way down I figured I might as well sleeve it too.
- Solution: It will take the hands of Zeus to bend these axle tubes now.
- 4.88 gears – G2 Axle & Gear
- Issue: 4.10 gears can move 35″ tires but not very well. As it is, I wish I had upgraded to 4.56 gears when I moved to 33″ tires.
- Solution: 4.88 gears for 35″ tires is what the vast majority of forums recommended based on collective experience. I 100% agree. 4.88 feels as close to stock as you can get with this level of modification.
- Riddler Dana 30 Front Differential Cover
- Issue: After stripping the axle down, sleeving the tubes, welding in a truss and C gussets – might as well upgrade the differential cover too.
- Solution: This differential cover is thicker than the stock Dana 30 cover. Like the rest of this axle build, having just that extra level of beef means it will require some serious abuse in order to actually damage this axle.
- RCV Axles 27 Spline
- Issue: Bigger tires means potential axle shaft breakage. The most popular option is to go with set of chromoly axles that have a stronger metal over factory and retain serviceable U-joints. The problem with U-joints is that they become weaker when the tires are positioned at extreme angles and power is applied, for example when climbing obstacles or sawing the wheel in mud or snow. The binding that can occur will either warp the axle tabs or pull the U-joint out over time. The real question is how much money do you want to throw at this problem? At this point some might choose to just go with a bigger, stronger axle but I wanted to max out the stats of the Dana 30.
- Solution: I threw all the money at the problem and prayed that 27 splines was enough. Branded as the ‘strongest axles on the planet’, ‘the last axle you will ever need’, and a ‘no questions asked’ lifetime warranty for 35″ tires – woh! The RCV is a true constant velocity, unit bearing axle with materials strong enough to support a 35″ tire and probably even bigger, just not warrantied.
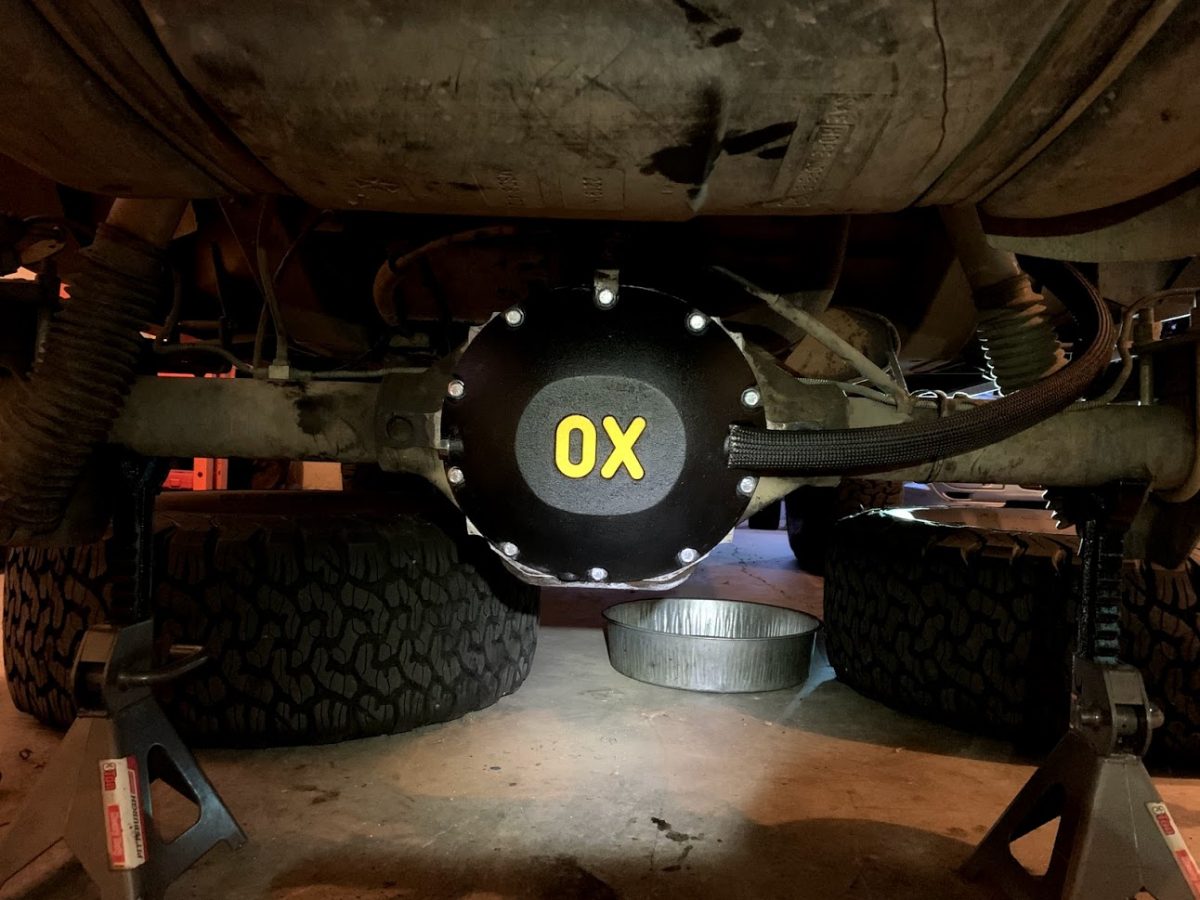
- Rear electronic locking differential – Ox Locker – Chrysler 8.25 – 29 spline C-clip – all gear sets + electric shifting system
- Issue: Anyone who has ever taken their open differential vehicle off-road and been in a low traction situation will discover the 4×4 does not truly mean that all four wheels spin at the same time. With an open differential when one tire on an axle losses traction it will spin while the other tire with traction doesn’t move. The solution is to lock the two wheels together. There are many articles and walk-through videos on the internet that describe this. While some Jeep Cherokees came with a factory limited slip differential in the rear axle this one did not. As a daily driver and touring vehicle I needed a selectable locking differential and, at the time, did not want to swap a more common axle in with more extensive aftermarket support.
- Solution: There aren’t many options on the market for Chrysler 8.25 axles – enter Ox Locker. They make a variety of locking differentials that pair nicely with their manual, electronic, or air engagement systems. You pay a premium for these locking differentials but the added traction is significant and noticeable when things get hairy.
- Front electronic locking differential – Eaton E-Locker – Dana 30 – 27 spline – 3.73 and up
- Issue: For that extra bit of traction – having a front locking differential (combined with a rear locker) provides for a true four wheel drive experience. The OEM Dana 30 axle placed in the front of the Jeep Cherokee is not necessarily the best candidate for a locker – my low pinion Dana 30 27 spline is no exception – however I wanted to be able to lock the front wheels with the flip of a switch for snow, mud, and some light rock crawling.
- Solution: Eaton is a major automotive OEM part manufacturer and therefore has a high standard for quality and longevity to uphold. This electronic locking differential for the Dana 30 could have easily been an OEM part, except the Jeep Cherokee was meant to be inexpensive and locking differentials aren’t a trivial cost. Overall I’ve been thoroughly impressed with this locker and have had zero issues. Traction is fantastic.
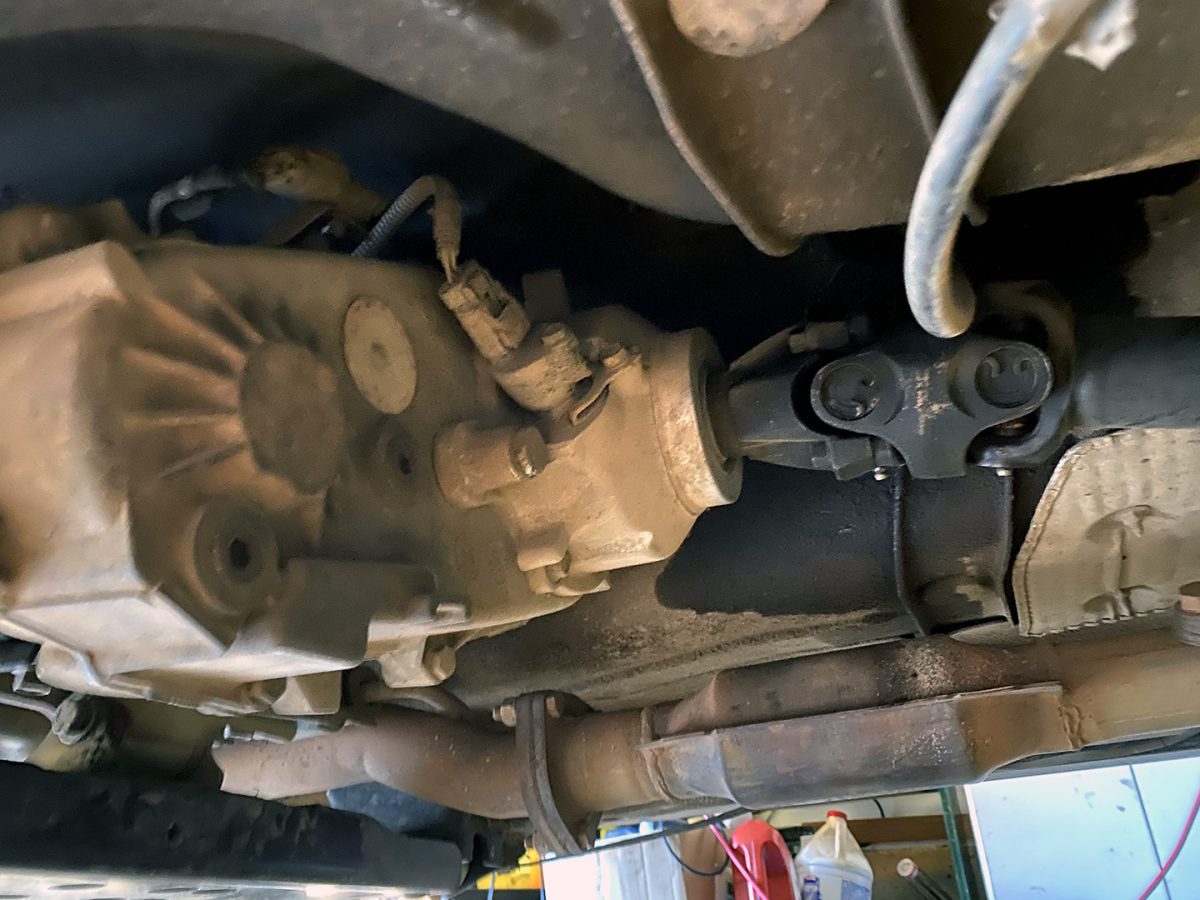
- Advance Adapters NP231 Slip Yoke Eliminator
- Issue: As you increase the suspension lift on a vehicle the drive line angles get pushed out of the factory comfort zone, so to speak. Improper drive shaft angles typically result in vibration felt while driving around town. There are lot of articles written by more qualified people than I about this topic that discuss reasons and solutions in much more detail.
- Solution: The bottom line for an amateur like me was – eliminate the vibrations; increase drive train life. The Rubicon Express 4.5 inch short arm lift came with a transfer case drop which consisted of a few extended length bolts and spacers to drop the cross member by about an inch. My research suggested that this was a short term fix which would present problems later down the road, so I opted to skip directly to the SYE, or slip yoke eliminator, which essentially replaces the fixed yoke on the back of the NP231 transfer case with a heavier duty output shaft and a standard 1310 CV yoke capable of accepting a double cardan drive shaft. All this means is a smoother delivery of rotational force from the transfer case to the differential.
- Front and Rear Tom Wood’s custom drive shafts
- Issue: With the addition of the SYE the OEM rear drive shaft will no longer bolt up to the new yoke.
- Solution: A custom length drive shaft will need to be ordered and measurements taken from yoke to yoke with your lift already installed. There are many drive shaft makers out there – I went with Tom Wood’s because of their reputation as a quality manufacturer. When my factory front drive shaft started showing its age I went ahead and replaced it with a stronger Tom Wood’s drive shaft as well.
- G2 Axle & Gear – Ring and Pinion – 4.10 ratio – Dana 30 low pinion and Chrysler 8.25 differentials
- Issue: Neither the Dana 30 (low pinion especially) or the Chrysler 8.25 get a lot of praise in the off-road world, but these are the cards (axles) that the Jeep Cherokee was dealt in 2001. With bigger tires and a suspension lift a better gear ratio is desirable in order to get all that mass moving and to make the vehicle feel like it has the same power as stock (or better). Installing a new ring and pinion correctly with the right gear ratio is one of the hardest parts of a full build and is typically best left to professionals who know how to properly set pinion depth, measure backlash, and understand gear mesh patterns.
- Solution: …that being said I tore the differentials apart, purchased a backlash gauge, borrowed a shop press, ordered the appropriate master install kits with new bearings/shims/bolts and did it all in my garage, but it took almost as much time as installing the entire suspension lift. It takes patience and repeated assembly/disassembly. Furthermore, although initially I felt like I was rolling the dice a bit going with G2 hardware I have since been pleasantly surprised with the longevity and lack of issues. Admittedly, the 4.10 gear ratio with 33 inch tires feels noticeably slower than stock. If I were to do this build over again I would have went with 4.56 gears, like many XJ internet scholars recommend. Half the time, on hills, the transmission doesn’t know what it’s doing and is constantly hunting gears. It’s liveable, but not ideal. For what it’s worth, I average 14 MPG with this setup doing mixed highway and trail driving.
- 36 tooth speedometer gear – Don’t forget to install a new speedometer gear in your transfer case when putting on bigger tires and gears so that your speedometer inside of the vehicle reads correctly.
- Rear Drum to Disc Brake conversion for Chrysler 8.25″ axles
- Issue: There is nothing inherently wrong with the drum brakes on the XJ. It’s just that they’re a little “old school” if you know what I mean.
- Solution: The 1994 – 1998 Jeep Grand Cherokee ZJ components swap over with very little modification to the Chrysler 8.25″ axle found in the XJ. The link above provides one of the best guides to completing this swap. The benefits I noticed were:
- Simplified future maintenance
- Slightly improved brake feel and balance
- This swap was significantly cheaper overall at ~$100 vs ~$600 for an aftermarket kit.
- Odyssey Extreme AGM PC1500 battery – 850 CCA
- Issue: This little Jeep doesn’t require a lot of electricity – the efficient LED lighting keeps the load down and the stereo isn’t off the handle. However… the Smittybilt winch has a 650 CCA minimum in order to function properly.
- Solution: 850 frosty bucking amperages are unleashed with this AGM battery by Odyssey. Since purchasing new back in late 2018 I have had no issues. I’ve winched a couple times off of it, powered lights and radio for hours on end, as well as tested its ability to keep a Dometic fridge running for several days.
- Battery Terminals by InstallGear
- Issue: The first sign that I needed new battery terminals was that the old wires were quite literally rotting off. The second sign was that all of the extra electrical goodies that were being installed needed their own connections to the battery.
- Solution: Enter the multi-gauge, multi-input battery terminals by InstallGear. Their solution provides all the necessary connectivity one would need in an affordable, modest package.
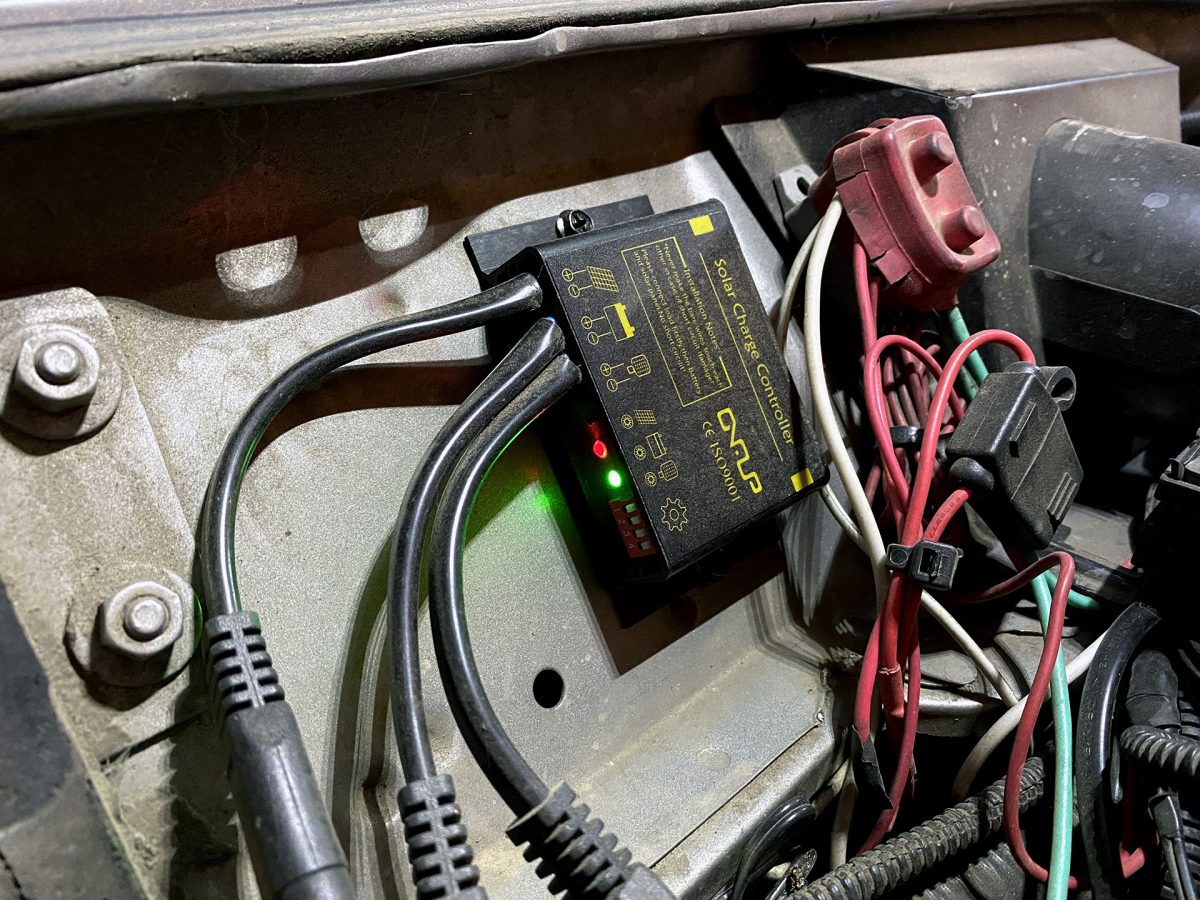
- Suner Power Waterproof 10A Solar Charge Controller
- Issue: While the Odyssey battery has held up well to-date – I wanted a backup method of charging the electrical system and the ability to keep the battery topped off with a trickle charge.
- Solution: Small charge controllers are plentiful and cheap. This one was easy to install and has an SAE input connector that I can hook up to my 100W solar panel if needed. I also found an adapter that would allow me to trickle charge the battery using a smaller Goal Zero backpacking solar panel. This unit expands your charging options and is handy for long running or energy intensive overlanding or car camping trips.
- Rigid Industries D-series Pro spot beam 3 inch LED cubes – front
- Issue: 1) The original fog lights in the factory front bumper provided some additional low ground illumination but pale in comparison to the more modern LED solutions on the market today. 2) The fog light holes in the JCR bumper were pre-cut for 3×3 cube fog lights.
- Solution: To fill these holes I bolted on a pair of Rigid’s LED cubes with the spot beam pattern. At the flip of a switch I can turn night into day in whatever direction their pointing, transforming night into day and increasing visibility much further down the trail than even Rigid’s Trucklites on high beam.
- Rigid Industries D-series Pro flood beam 3 inch LED cubes – rear
- Issue: How many times have you been on a tight trail in the middle of the night and had to back up? You’re backing up… backing up… *crunch*. Or maybe you arrive in to camp late and want to back in to a spot. The Jeep Cherokee’s reverse light brightness, like nearly every other light on the vehicle, is modest at best.
- Solution: Aftermarket bumpers may offer pre-cut holes for aftermarket reverse lights, but this project hasn’t reach a level where it makes sense to replace the factory bumper. So I pulled out the cutting discs and dremel and put a pair of 3×3 holes in the rear bumper to mount these lights. It was important that the lights and wiring be protected and not just bolted externally to the bumper. The result was just as extraordinary to behold in the dark as the front Rigid LEDs – the darkness just melts away.
- Rigid Industries Truck-Lite 5″x7″ LED headlights
- Issue: The OEM one-piece 5×7″ bulb assembly on Jeep Cherokees are not dissimilar to those gas lanterns in ye olden thymes of yore – always just a whisper away from being blown out and plunged into eternal darkness. Compared to the modern optics in todays cars and trucks, these standard headlights leave a lot to be desired.
- Solution: Not so with the Truck-Lite LED headlights by Rigid Industries. Yes – they’re expensive. But, yes – They are the #1 upgrade I did to the Jeep early on. They produce such a crisp beam pattern that you would think they’re projectors. The light is bright and consistent and doesn’t scatter – just a clean, bright, white light in the places where you need it to be for optimal visibility. Because the beam pattern is so precise and aligned so perfectly, I’ve never had other drivers complain or flash their lights at me. The only downside is that because the LEDs do not produce much heat snow can build up around the headlight housing, but… that’s why you add fog lights and light bars, right?!
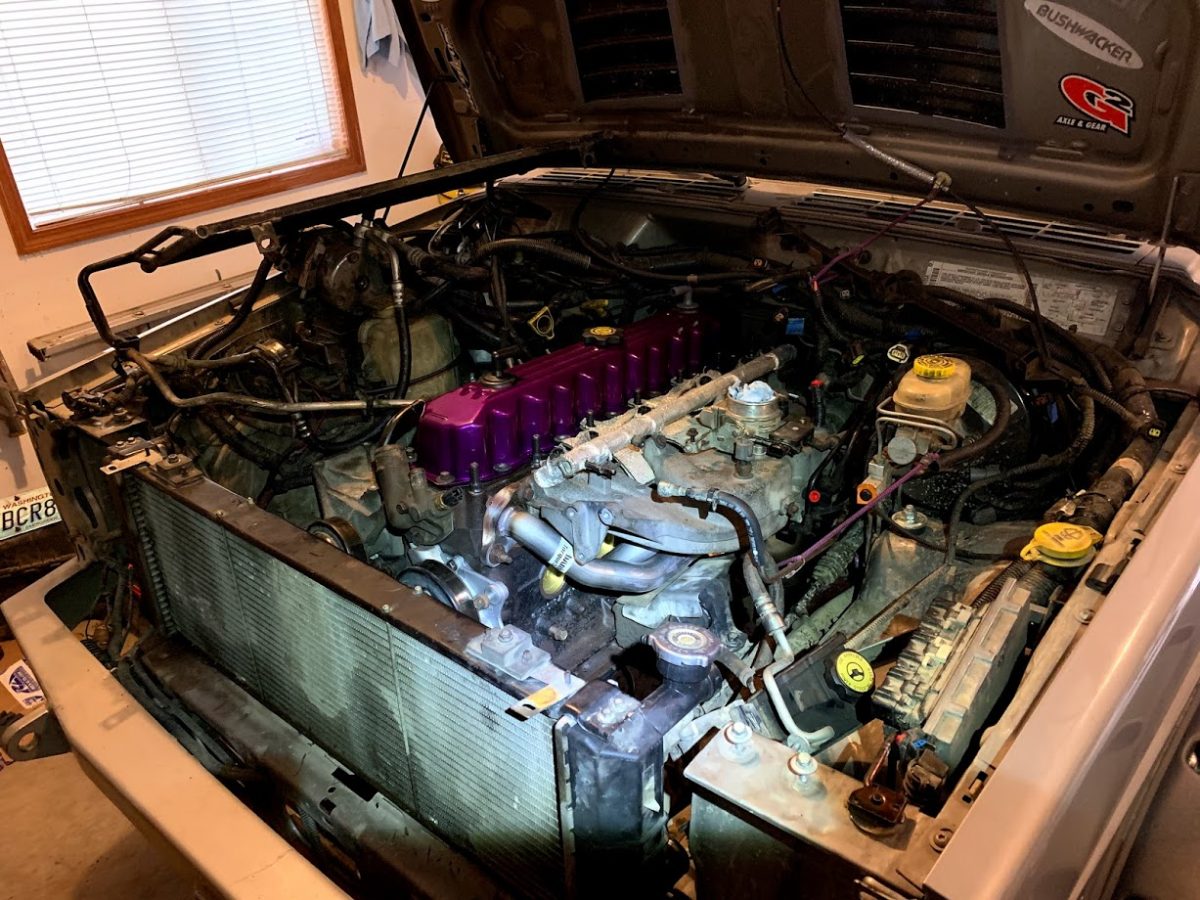
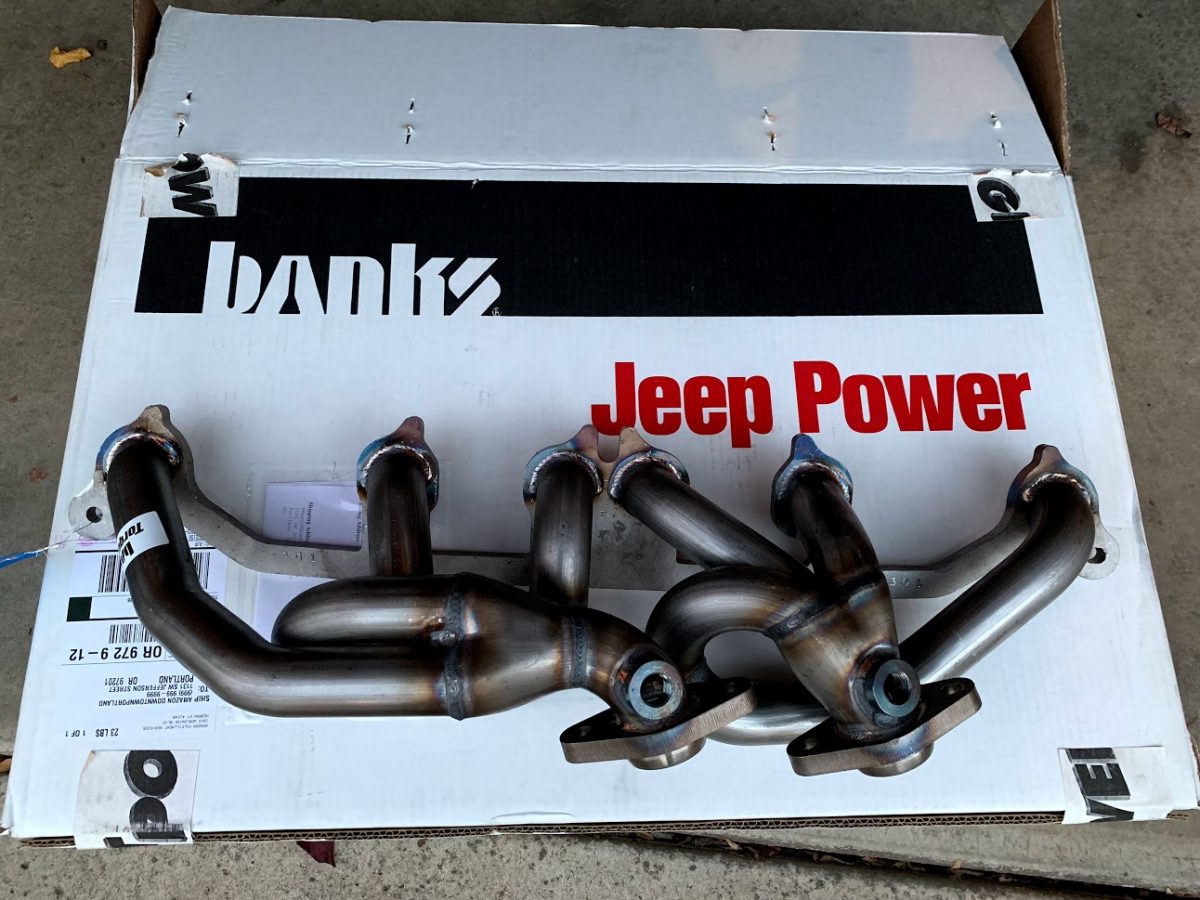
- Banks 51306 Torque Tube Header
- Issue: There isn’t necessarily anything wrong with the OEM header, however as I was swapping out my high mileage motor with lower mileage unit from a 2000 Jeep Cherokee I decided to upgrade to a quality stainless steel header from Banks. For 2000-2001, Jeep moved to a distributor-less ignition design with a rail of coil packs on the 4.0L motor, they also updated the exhaust system to meet California emissions standards. Two additional catalytic converts were added to the end of the header. This means that this model year of Jeep Cherokee requires a slightly different header design in order to maintain this emissions standard. The Banks header product linked above is the one that fits on this model year. For older (1999 and later) Jeep Cherokees you will need the Banks 51327 Torque Tube Header.
- Solution: The Banks header is a quality part in all respects. With some cheaper alternatives floating around the internet you hear about issues such as cracking, warped materials, fitment issues. Banks knew what they were doing when they designed and built this header for the Jeep Cherokee. Theoretically it will provide a slight power increase and better throttle responsiveness. I noticed a slightly more aggressive exhaust note with my stock muffler. The other advantage to this design is better heat dissipation.
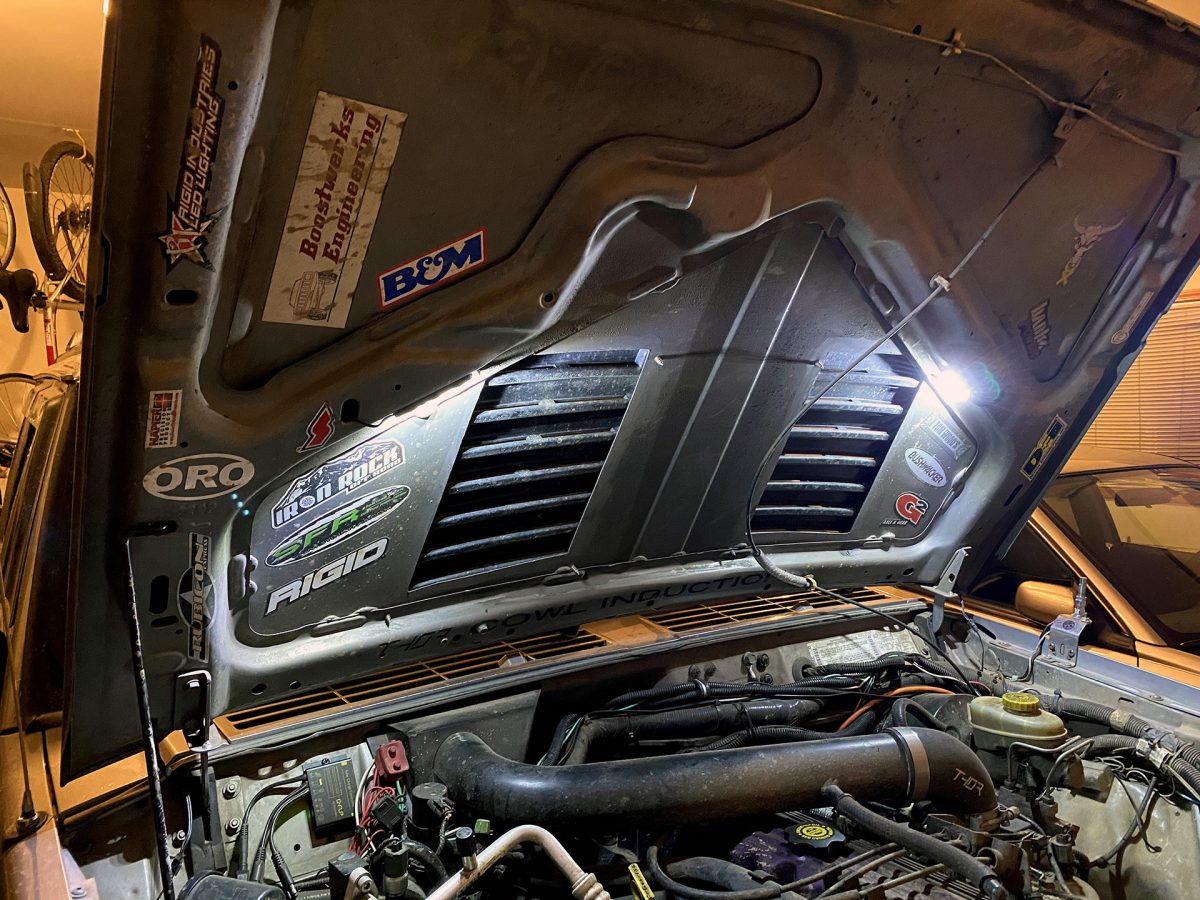
- Trail Head Off Road (THOR) Cowl Intake
- Issue: The Cherokee’s air box location isn’t terrible, but it’s not great either. It sits behind the driver side head light and you would need to be sticking the nose of the vehicle in a hood level bog in order to start sucking water into your engine. Furthermore, that airbox and filter assembly takes up a lot of precious space on the driver side of the engine bay. It’s a perfect location for a winch solenoid, air compressor, second battery, switch relays – imagine the possibilities!
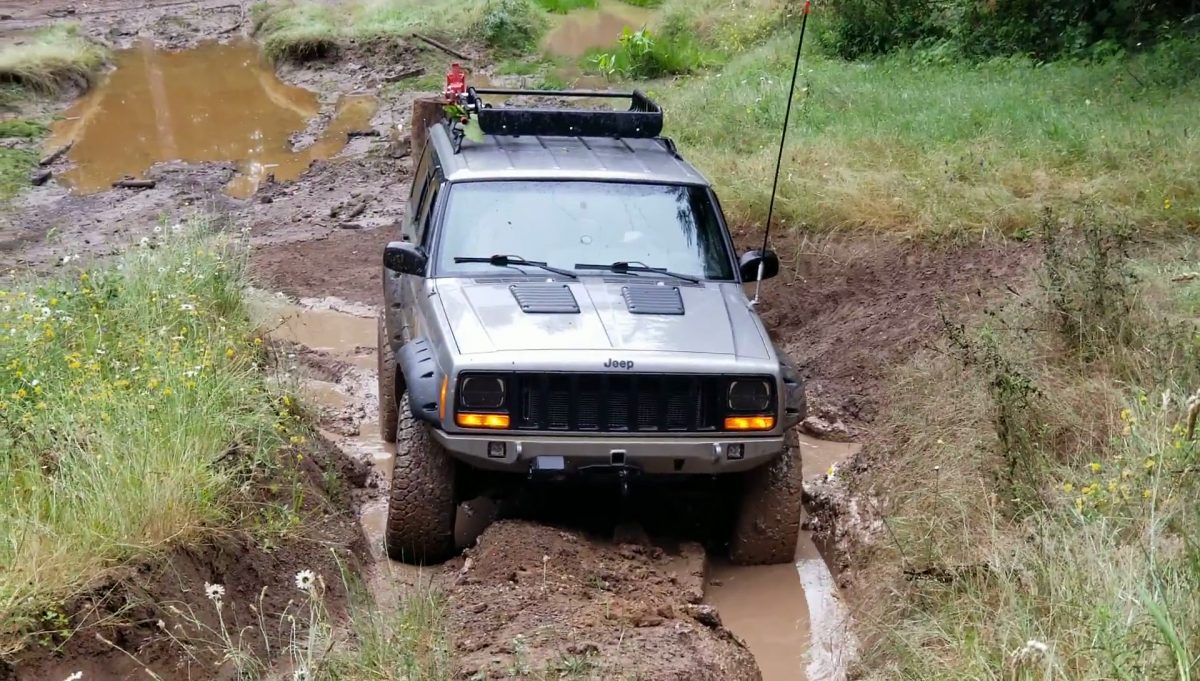
- Solution: Australians are big fans of the snorkel. This Jeep isn’t exploring deep river crossings in the outback, but it occasionally encounters mud pits and pockets of deep standing water. The THOR cowl-mounted intake system is a subtle way of relocating the engine’s breather tube further back and higher up to a location just below the windshield. Supposedly the air collected here is colder and denser which probably adds at least 7 horsepower but I haven’t felt it. What is noticeable is the rather violent induction noise that now permeates the inside cabin area while driving. Now I can be rest assured that I’m not hoovering up chocolate water while fake boost launching through mud holes. Yuus!
- Fuel rail and injector cover kit by Design Engineering
- Issue: By design, the 4.0L motor has its header located directly beneath the air intake manifold, fuel rail and injectors. Needless to say, the amount of heat in this region of the engine bay is significant, so much so that after turning the engine off immediately after any kind of intensive engine usage, the fuel in the injectors will vaporize and cause the engine to sputter and misfire when attempting to start the engine back up. While this issue usually clears up within 15 to 20 seconds, it’s very unnerving and can trigger engine misfire codes.
- Solution: This kit, by Design Engineering, blocks and insulates the entire fuel rail and injectors – virtually eliminating the problem.
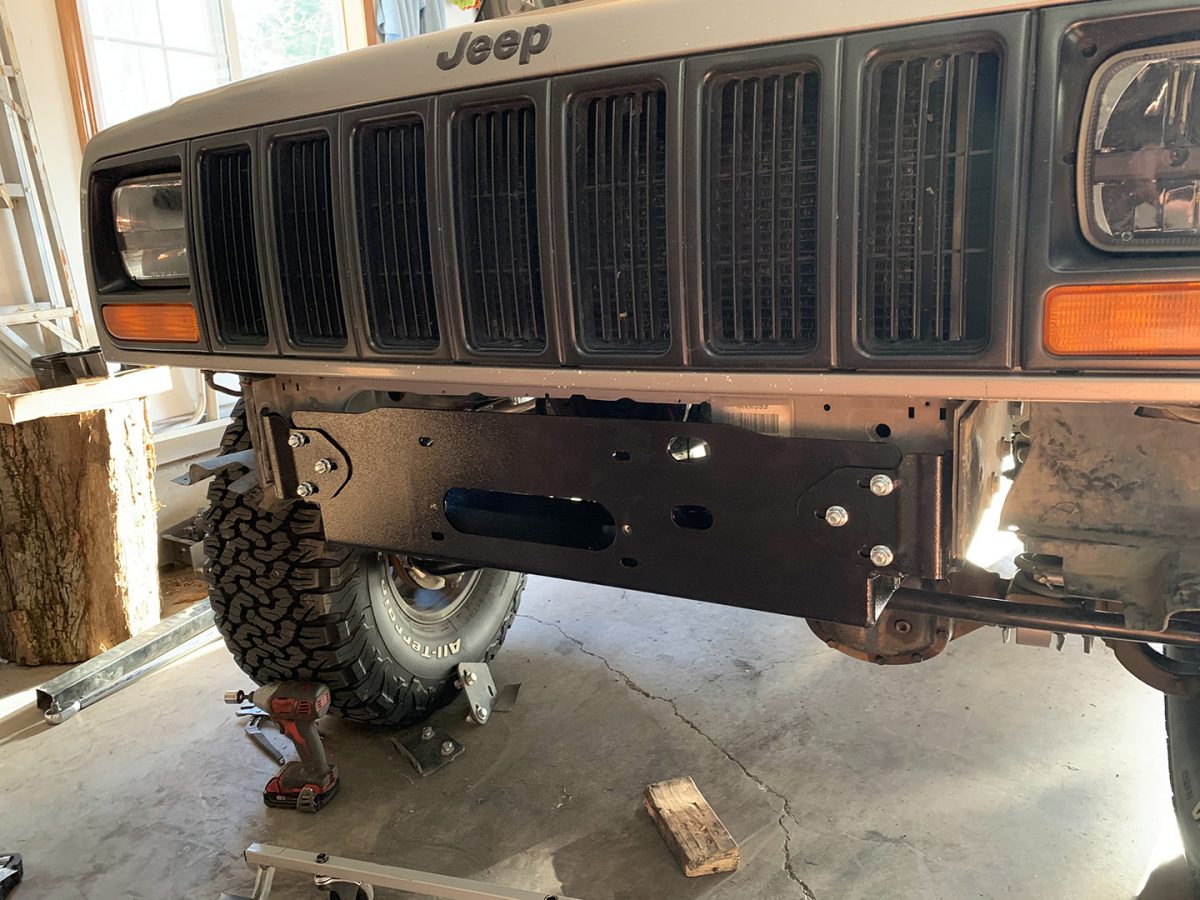
- Boostwerks Hidden Winch Mount and Steering Support
- Issue: There are two common schools of thought around mounting a winch to an XJ.
- The first, and the option I went with initially, is a winch mounted to a portable plate with handles which mounts to a 2 inch receiver hitch. It can be mounted front or rear and can be removed when not in use.
- The second is a front bumper with a winch mount location. Typically, these bumpers stick out enough past the front face of the grill to allow the winch to be position squarely in the top middle of the bumper and is visible for the world to see and say, “Hazzah! That’s a Jeep with a winch. It can winch things!”
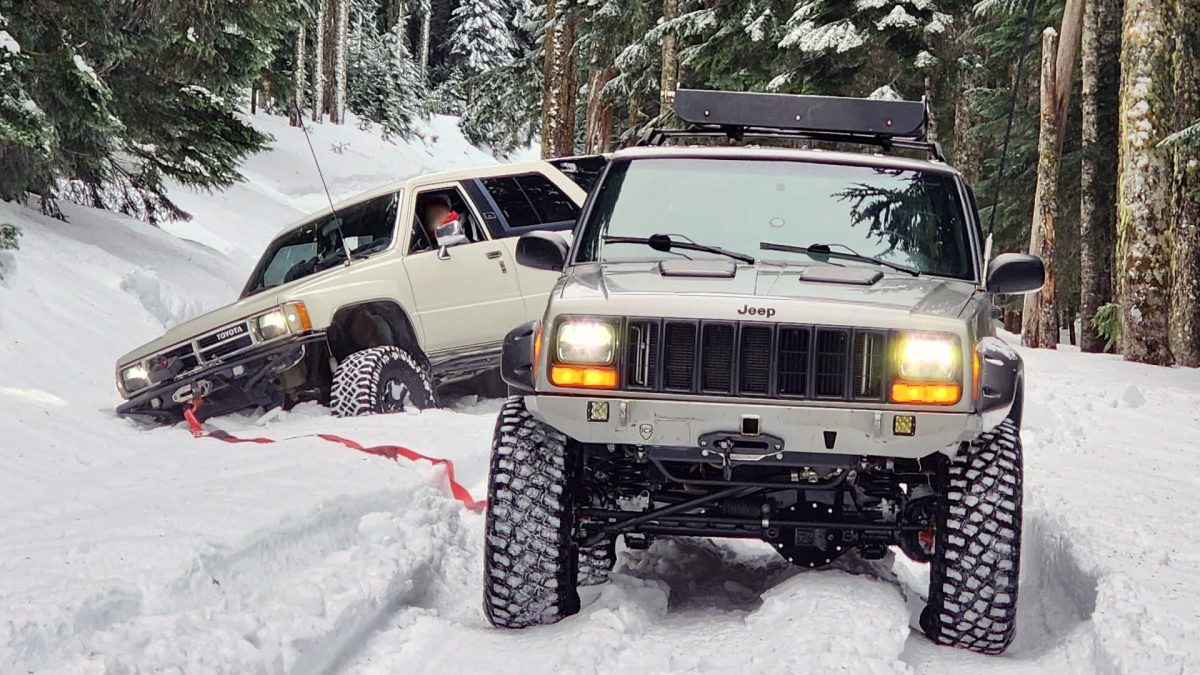
- Solution: First, if you’ve ever tried positioning a “portable” winch into a 2 inch receiver hole while in a situation where you’re good and stuck – it’s a real pain. Second, I didn’t want the world to gaze upon my winch and start scheming ways in which it could be removed nor did I want it hanging out in the elements getting showered repeatedly with mud, snow, and the tears of joy from freshly recovered Hyundai drivers. No, I wanted it tucked up behind the front bumper even if it meant cutting out a piece of the sub frame and trimming out bits of the JCR bumper.
- Smittybilt XRC Gen2 9,500lb winch with synthetic rope – A solid, dependable entry-level winch sized just right for the XJ.
- Tree strap, 4 inch, 8 foot, 40,000 lb rating – In order to get a good anchor point to clip the winch line to a thick, wide tree strap is crucial.
- Snatch block – If you need extra leverage the snatch block can be a game changer.
- Issue: There are two common schools of thought around mounting a winch to an XJ.
- Upgraded recovery points
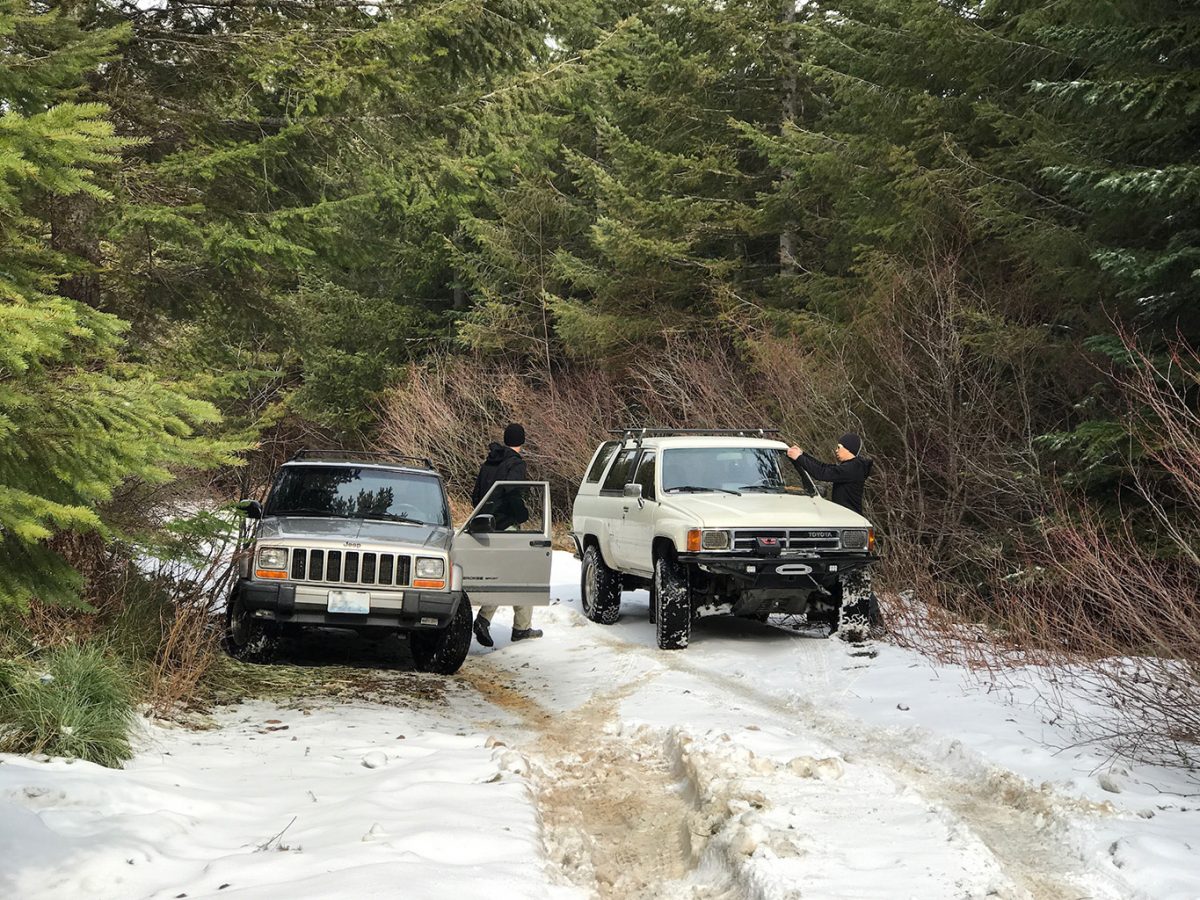
- Issue: When you’re in a stock vehicle you have to rely on a backup vehicle to get you unstuck. Unfortunately, most Cherokees from the factory did not have tow hooks to latch on to. The previous owner had equipped a Curt tow hitch in the rear, but I discovered on one trip that the front had virtually zero points to recover from that didn’t involve potentially bending something of importance.
- Solution: What all of this means is that it’s important to maximize available recovery points on your vehicle. It’s also equally important to carry a few quality pieces of gear. Here’s what I had starting out:
- Tow strap, 10,000 lb rated, 30 foot – It’s not sexy, it’s not glamorous but a heavy duty tow strap and two vehicles can go a long way.
- Receiver hitch D-ring with shackle – Turns the tow hitch into a solid recovery point.
- Pair of D-ring shackles – With the addition of the JCR front bumper I had added two front recovery points via shackles.
- Issue: Before owning this Jeep, never in my life had I encountered a situation where not only had my vehicle been forcibly broken in to and goods stolen but the perpetrators attempted to start and drive off with the entire vehicle. There are some terrible individuals out there.
- Solution: Good thing I had a few basic security modifications installed otherwise this Jeep would likely no longer be in my possession. For obvious reasons there are no pictures in this section.
- Fuel pump kill switch – Interrupts power to the fuel pump relay. When power is cut to the fuel pump the engine will crank over and over but will not get any fuel to actually start. This is a cheap, simple, and highly recommended security mod for any vehicle. If the thief doesn’t know where the switch is they can’t activate the fuel pump unless they are very familiar with the wiring on your specific vehicle.
- PDC relay circuit magnetic reed switch by Off Road Only – This is plan B, in the event the thief does find the fuel pump switch, they can continue to try and start the Jeep but it won’t fire up until this other hidden switch is also activated. The most clever part is that it requires a magnet to be swiped at a very precise location in order to send power to the PDC relay for a brief period of time. So not only does the thief need to find the first hidden switch and understand what it does, but they also need to know to be carrying a magnet and to swipe it on a specific point at a specific step in the ignition process. Ultimately, if I was on meth and needed to cash in with a vehicle theft for a quick fix I would just give up at this point and go steal the Honda Civic parked nearby.
- Iron Rock Offroad 5.5″ Front Coil Springs
- Issue: Fitting 35″ tires in the front has a minimum requirement of an additional 2 inches of lift for a total of 6.5″. That is unless you want to cut out more fender but I wanted to preserve the body of the XJ.
- Solution: The Iron Rock Offroad Dana 30 over-axle truss raises the coil spring mounts by 1″ and back 0.5″ over the stock Dana 30 for better coil spring retention and alignment throughout the suspension cycle. As a result, I only needed 5.5″ springs for the front end.
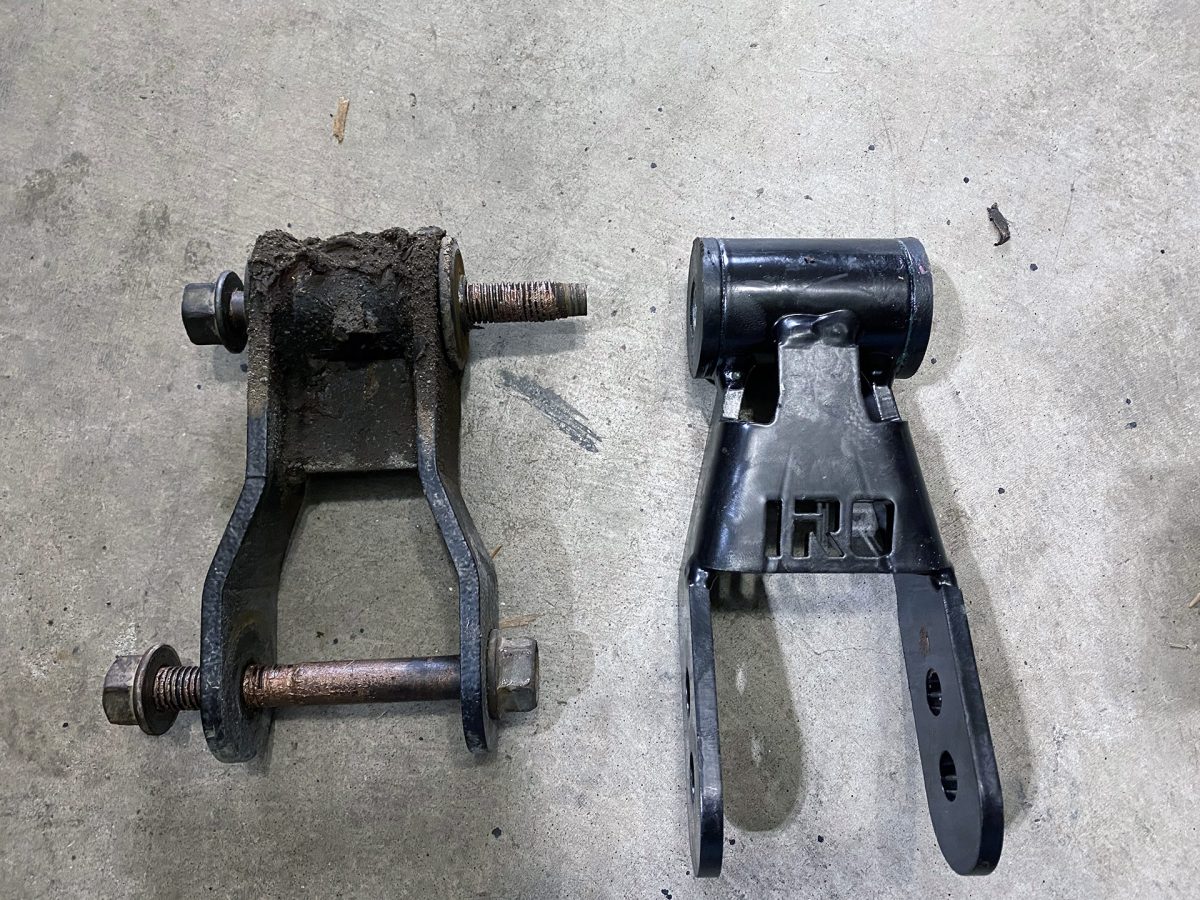
- Iron Rock Offroad 1″ or 1.5″ Adjustable Boomerang Rear Shackles
- Issue: Fitting 35″ tires in the rear without cutting requires an additional 2 inches of lift and I didn’t want to replace the leaf pack.
- Solution: I went with longer, adjustable shackles to add 1.5″ of lift and it works, although that truly only gives me 6″ total lift in the rear. I may look at doing an add-a-leaf to get the remaining 0.5″ and also stiffen up the rear to carry more weight.
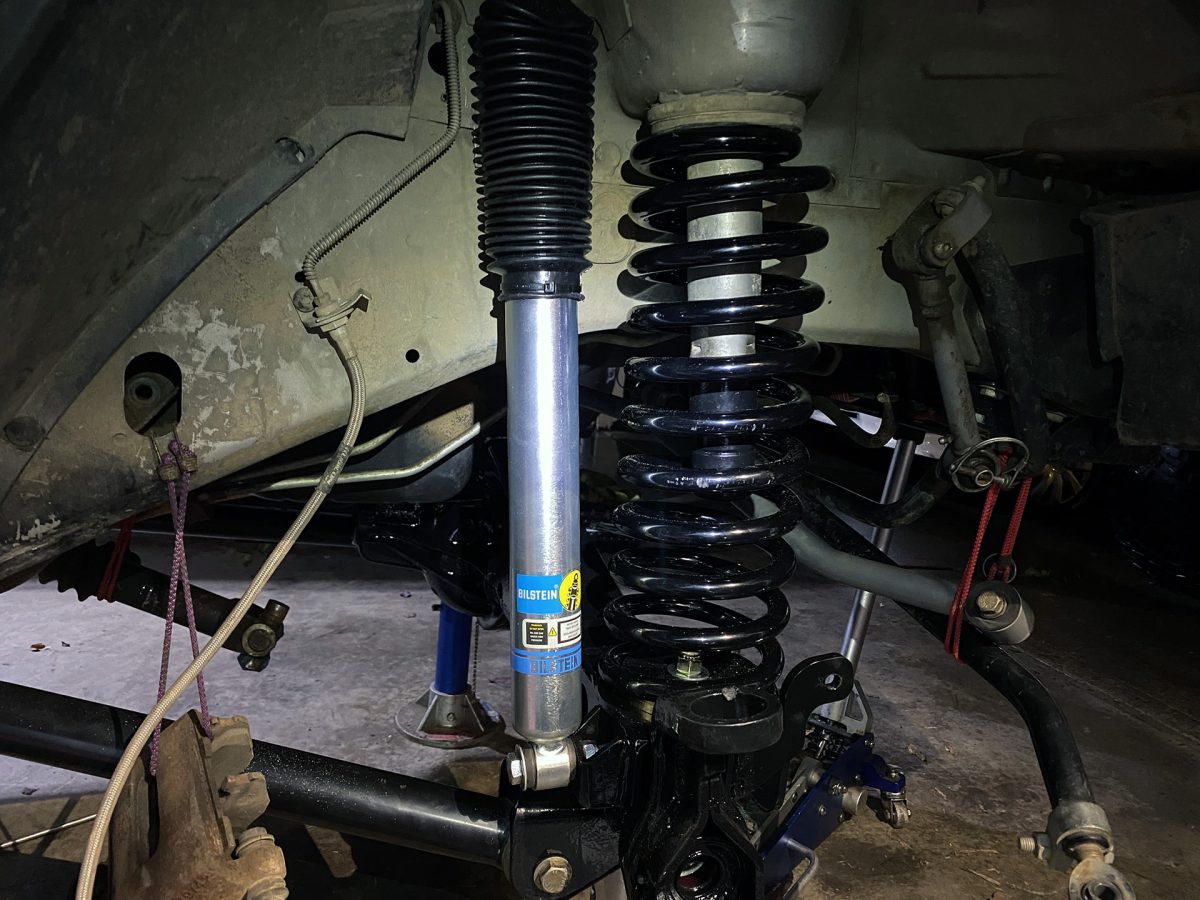
- Bilstein 5100 Series Shock Absorbers
- Rubicon Express 4.5″ Superflex Lift (removed) – with short arms (removed) + Full Rear Leaf Pack (current) + Bilstein Monotube Shocks
- Issue: Small wheel arches and unibody design require a significant lift in order to clear larger tires, unless you want to do a lot of fender trimming.
- Solution: Perfect lift height for clearing 33″ tires with minimal trimming.
- Rubicon Express Steering Stabilizer
- Issue: Larger tires and a lift may have the adverse symptom of increased bump steer.
- Solution: Integrating a properly sized hydraulic shock that connects the axle and the steering arm can decrease this issue. Ultimately, an upgraded over the knuckle steering setup allowed me to remove this from my setup.
- Rubicon Express Sway Bar Disconnects
- Issue: The rear sway bar is removed with the Rubicon Express lift kit and the front can be removed as well, but there are reasons why you might want to keep this mechanism in place. At high speed and in terms the vehicle may become less stable when sway bars are removed from the suspension equation.
- Solution: “Quick” disconnect kits can be used to set the sway bar at the correct angle to retain stability during cornering or highway driving and also come with a dis-connectable bracket for off-road use when full wheel travel and axle movement is needed.
- Iron Rock Off Road – Heavy Duty Over the knuckle Steering 1/2″
- Issue: There are a few problems with the Jeep XJ’s OEM steering setup. 1) With larger tires there is increased wear on the ball joints and on aged setups a lift and larger tires can multiply the decrease in durability. 2) The materials used are thin and weak when bashed against rocks or stumps. Many XJ owners have reported bent or broken steering arms when pushed hard off road.
- Solution: Stronger, thicker metals and improved joint design can produce a significant upgrade for your Jeep. The Iron Rock Off Road solution I installed was so good that it allowed me to remove the steering stabilizer from the equation entirely.
- Iron Rock Off Road – Rock-Link Front 3-link Long Arm Kit
- Issue: There are numerous videos online discussing the pros and cons of short arm vs long arms on straight axle vehicles. One of the most prominent issues I noticed with the 4.5″ lift is that the increased downward angle of the short arms transmits quite a bit more turbulence from the terrain into the vehicle. In other words, bumps just felt harder with short arms.
- Solution: I can attest that the increased stability of a 3-link long arm on the Jeep XJ much appreciated and there is a definite improvement in comfort-ability both on road and off road. With articulation short arms certainly become a bottle neck with larger lifts, long arms remove that limitation.
- Tires – 35″ BFGoodrich KM3 Mud-Terrain (35×12.5xR15)
- Issue: After years of reliable service from BFGoodrich’s K02 all-terrain tire I decided it was time to upgrade to a more aggressive setup. The K02 is a fantastic tire and I can’t recommend it enough if the goal is mostly highway/gravel road driving and a little bit of deep snow and a tiny bit of mud. In my case, I had reached the limits of the KO2’s abilities in deep snow and mud.
- Solution: The KM3 has a more knobby, chunky tread pattern which generates more grip on loose surfaces. It has stronger sidewalls than the K02 which makes it a sturdier tire when bouncing against rocks, tree roots, and other nasty stuff. The larger diameter will increase ground clearance and decrease hang-ups on the differentials. The final reason is that I couldn’t have the Mercedes sitting on 35s when the Jeep was purpose built for this type of thing. The axles are already setup with electronic locks front and rear so I will really be able to maximize the potential of the KM3s.
- Wheels – Pro Comp Series 69 Flat Black Alloy (15×8″)
- Issue: The factory Jeep wheels did not have the required backspacing to fit a larger tire.
- Solution: Pro Comp makes a durable, light-weight wheel and a simple design for easy cleaning. At 16lbs, 3.75″ backspacing, and a 5 x 4.5″ bolt pattern this wheel is a overall improvement to the factory wheels. Steel wheels are a better option when wheel damage occurs. Typically steel can be bent back into place easier than aluminum alloy, but because this Jeep is not rock climbing or stump jumping it’s a highly unlikely situation. I also carry a spare which is easier to swap on in order to get moving again.
- Lug Nuts – Pro Comp BLAAACK Nuts
- Issue: Why not?
- Solution: Color goes with the wheels.
- Tires – 33″ BFGoodrich KO2 All-Terrain (33×12.5xR15)
- Issue: The factory tires were adequate for highway cruising and gravel roads but traction and differential clearance become weak points of the smaller, all-season tires.
- Solution: In order to improve ground clearance and traction while still retaining stock axle strength and maintaining highway drive-ability a 33″ all-terrain was the logical choice. BFGoodrich’s KO2 is a proven tire design that does 90% of what I need it to do on pavement, snow/ice, and mud. For the remaining 10%, there’s always the BFG KM2 or KM3 mud terrain.
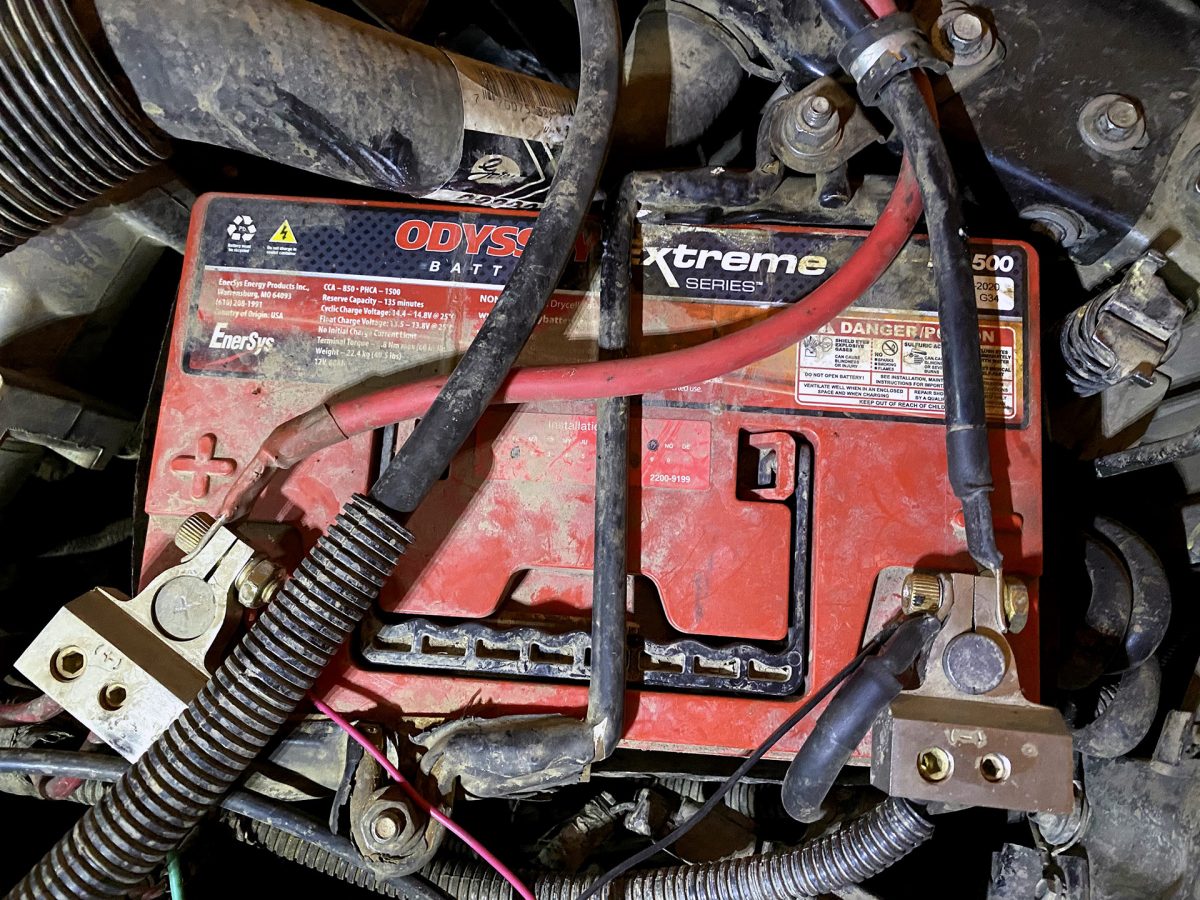




First up, I’ve read a lot of XJ build posts while planning our our own, but this is the one that is always open on my computer! Just wanted to ask what battery terminals you have there? They look solid while mine is minced up and needs an upgrade. Thanks in advance… again, great build thread!
Hi Will, updated the Electrical section with a link to the battery terminals. They’ve been great so far!
I like your article. I just kicked up a 96 Cherokee j. Found a deal on some used michelins the ad stated they were205 zipr 15′ . When they showed up they were Michelin 65 %tread left . Five of them on nice jeep rims, spare had never been run. Got pretty excited till we unloaded the first one about 7″taller than what was on my jeep. 255 x70r x18. He had some one else place the ad and didn’t notice the error. I couldn’t pass the deal up. I’d like to run the tires but don’t really want to lift the jeep. Is there any way that I can run the 18’s without a lift. I’v e thought about pulling the flares and modifieing them but haven’t pulled one yet to see what all I would have to do. It looks almost like the tires would fit under the wheel wells alright . Iv’ not had time to check that out either, my schedule is hectic and will be hectic for some time. I’d like to be driving the jeep rather than my truck which gets 6 to 8 mpg on a good day.
It’s possible but you will have to cut into the fenders and add bump stops. You may also rub on the lower control arms unless you adjust your steering lock.
Hey, what the mpg?
Shhhhhh, you’re going to anger the jeep gods.
The common answer:
“Hey, y u care it Jeep.”
The honest answer:
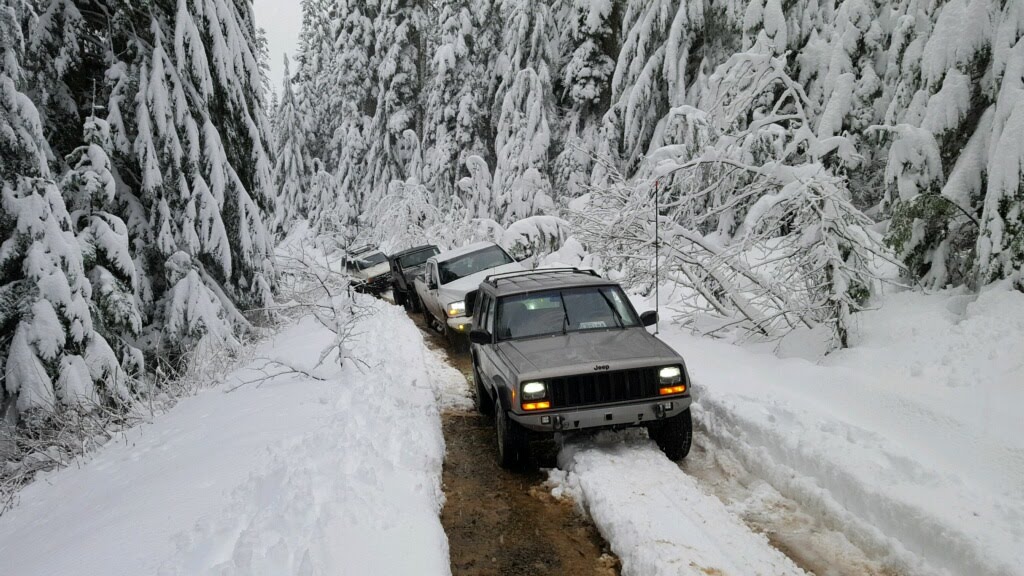
13.9 MPG average over 30k miles driven. For trail driving and snow wheeling that MPG drops to about 10. My feeling is that MPG is important if you’re going on long distance trips, but less important if you’re always going to be close to a gas station or a dependable source of portable fuel. It’s an interesting variable especially when snow wheeling because you have to anticipate how far you’ll be able to make it; how much time you’ll spend being stuck, how much time you’ll spend waiting behind other people who are stuck, how much time will be spent maneuvering around people who are stuck or getting them unstuck. A lot of fuel is wasted when you’re waiting for something to happen before being able to move again. If you’re goal is overlanding, i.e. traveling long distances and camping or going somewhere “off grid” you will start factoring in range of travel.
Awesome article! Gave me plenty of Ideas for my ’96 XJ, Best of luck!
Outstanding write up. I’ve been using a 2001 XJ for nine years as a daily driver. About to drive it another nine, but for fun with an overland focused build. Yours is the first website I’ve landed on – Thanks for sharing the details, the lessons learned and the logic behind your intent. Very valuable!
I would love to see more details about the mods you had to make to the hidden winch and bumper to get them to work together JCR use to offer the bumper without the receiver hitch that would allow for the winch to be centered
Hi Steve, check out boostwerksengineering.com – they fabricate hidden winch mounts for the Jeep Cherokee XJ. There is some cutting, drilling, and grinding of the chassis required to install and the mount itself aligns the winch fairlead slightly off-center of the front of the vehicle. This is because of where the stock steering box is located. As for modifying the JCR bumper, I had to clearance the bottom supports of the 2″ receiver that sit behind the bumper and cut a slot just below the 2″ receive hole to align with the output of the fairlead on the winch mount. The other part to consider is where to mount the winch solenoid box. One option is to extend the cables up and farther back under the hood somewhere. In a few of my photos the solenoid box is actually mounted to the front and outside of the bumper just asking to get bashed in by a rock or a tree. I ultimately opted to use the existing short cables and mount it inside the bumper. You’ll see in some photos that there is a gray square in the bumper that is attached with screws for easy access to the solenoid and wiring. Although this location isn’t ideal when deep water or mud is involved, it’s worked well so far. Overall it’s a pretty tight fit but I like having the winch more protected from the elements and away from prying eyes.
Not meant to make you feel stupid! I just thought that guys that are already doing the huge lift and tires and lockers etc would’ve beefed up the electrical. I had to on the 97 to get it operational. That’s when I learned about the high output option. Price was certainly right too!
No high performing alternator swap project yet? I just picked up a 97 xj Country and a 98 xj Classic. I’m at the local U Pull so often that I kept my eye out for a 160 amp out of a 2000-02 5.9 Durango. Out the door-$31!ea
Great build, love the detail. Have you done the slip yoke eliminator? I recently put a 3in rough country lift on my 2000 and have experienced slight vibrations around 25mph and a brief rattle/grinding when I come off of my throttle at highway speeds. I’ve done a transfer case drop to mitigate some but not all of the symptoms. Any issues when you installed your lift?
Yes, good question, I’ll add this to the Drivetrain section.
In short – The Rubicon Express 4.5 inch short arm lift kit came with a transmission/transfer case drop to minimize drive line vibration. Essentially just a handful of longer bolts and spacers to lower the cross member an inch. I never installed the drop and instead installed an SYE at the same time as the lift. Most of the denizens of the internet recommended an SYE as a better long term solution to improve the rear drive shaft angle to prevent vibration and increase u-joint life. The reading that I did suggested that the crossover point for when drive line vibrations begin to emerge on lifted XJs is between a 3-5 inches while retaining the OEM slip yoke and driveshaft. There are some rules floating around the internet around the acceptable angles that different driveshaft types can be at before vibrations are likely to occur.
I can attest that with the Advance Adapters NP231 slip yoke eliminator + Tom Wood’s double cardan CV custom driveshaft + 4.5 inches of lift I have no drive line vibration at speeds under 80 MPH. That being said, a transfer case drop will get you on the road (or off road) for less cost. I suppose, like many things, it all depends on how much time and money you want to put into it.
Great article! And a verrrrry nice build. Looking to do a lot of this once I find my XJ. Getting close to reeling the right one in!
Thanks, Joseph! The platform is getting older and it’s getting harder to find clean, unmodified versions out there, but it’s still a great little off-road project vehicle. There’s still quite a bit more that I’ve done to this XJ that I want to add to the article. Let me know if there’s anything you’re interested in learning more about.
Nice XJ with great practical (and tasteful) mods. Thanks for great writeup. In later pics it appears you mounted a hidden winch behind the JCR front bumper? Will be watching for updates!
Yes! It’s the Boostwerks hidden winch mount and steering support. I’ve updated the article’s Recovery section with a bit more information about it. It required a bit of trimming and juggling to get everything to fit nicely. I’ve used the winch a couple times over the past year and it functions perfectly, even though if you notice in the pictures the actual location of the winch is slightly offset to the passenger-side.
so cool. The XJ has always been on my list as a potential project.
It’s a very easy platform to build on and tons of information available online.
6
7?
great article. Waiting for the (coming soon) to come 🙂
Anon, the article is now complete!