Weather conditions can change rapidly at elevation. Always be aware of the potential worst case weather scenario that could occur during the duration of your trip and be prepared for if it happens. For additional weather information please look at the following resources:
Trailhead Status
Devils Lake Recreation site is the access point to the South Climb trail and is the gateway to the Three Sisters Wilderness area. Parking at this site requires a recreation pass May 1 through September 30. Be aware that winter weather typically closes the road to this area from December through March.
Acceptable parking passes include:
- $5 Day Pass
- Northwest Forest Pass
- Interagency Annual Pass
- Interagency Senior Pass (America the Beautiful, Golden Age)
- Interagency Access Pass
- Interagency Military Pass
- Every Kid in a Park Pass
- Northwest Forest ePass
Check trailhead status before heading to the climbing route:
Road Closures
The main highway to South Sister’s southern climbing route is the Cascade Lakes National Scenic Byway (closed Dec – Mar). The current status of Oregon highways and roads can be checked here:

All climbers should be aware of the elements of risk associated with climbing South Sister. While some dangers are more likely to occur during particular seasons it’s important to be familiar with each type and how to avoid, prevent, or mitigate the risk associated.
Underestimation

What is it?
- When your boss farmer tan can’t route you back to the farm.
- South Sister is often characterized as an easy hike, or a “walk up” by some accounts, and while many inexperienced / ill equipped climbers are successful, this is not a climb for those lacking climbing experience.
- Winter weather conditions can change a trip from a standard hike to an unsurmountable challenge.
Why does it happen?
- They might say: “Trucker hat running bills up, bruh. We the best climber. Another one. Ain’t no hill gonna bring us down.”
- They could also say: “It’s only 10k’. How bad could it be?”
- Inappropriate or the absence of specific gear required for a given situation will increase climber risk.
- Lack of knowledge on the use of climbing equipment increases climber risk.
- Lack of ability to properly assess a dangerous situation and/or potential risk increases climber risk.
When is it likely to occur?
- Underestimation is most likely to occur when climbers have neglected to thoroughly understand the risks involved with climbing.
- As with any mountain, conditions can change rapidly at elevation causing increased risk of exposure which climbers may not have prepared for.
How can it be mitigated?
- Climbers should become as knowledgeable as possible about the route, conditions, risks, and up-to-the minute weather patterns on South Sister prior to a climb.
- Constantly re-assess risk and perceived danger as the climb progresses.
- Proper attire & climbing gear, emergency equipment, backup plans with people not on the mountain.
Other Climbers

What is it?
- You can control what you do, but you can’t control what other climbers do.
- Climbers may pass you quickly, stop in front of you, fall and slide into you, drop debris or equipment, etc. – In other words – Despite your best efforts, other climbers must be taken seriously as a variable of risk.
Why does it happen?
- Improved weather during the Spring and Summer months attracts more climbers.
- Whenever there are a lot of climbers together in a relatively small area there is the potential for danger.
When is it likely to occur?
- Spring and Summer seasons.
How can it be mitigated?
- Move quickly, carefully and efficiently along the path.
- Yield to uphill traffic while descending.
- Wait behind slower climbers, don’t pass unless they give you the OK.
- Pass quickly and well to the side of other climbers / teams.
- Give other climbers and teams lots of space.
- Travel single file.
- Be patient
- Be polite.
Mad Squirrels

What is it?
- 24 species of squirrels and chipmunks occupy the Pacific Northwest. On the south climb trail, the Golden-mantled ground squirrel may suddenly appear with an appetite for your snacks.
- It is recommended not to feed wildlife as it may become dependent on human handouts to survive.
- The Golden-mantled ground squirrel is common in central Oregon and mountainous areas of the western United States with open timber, down logs and stumps. It is often confused with a similar looking species called Allen’s chipmunk.
Why does it happen?
- During the spring and summer months Golden-mantled ground squirrels are gatherers of seeds, nuts and fruits – common food items for climbers to carry.
- While usually quite tame the Golden-mantled ground squirrel can become very curious about what’s in your pack and may attempt to snatch unsecured snacks.
- All of this food gathering occurs in an effort to put on a healthy layer of fat in the fall months so that the squirrel can hibernate from October to May. Having a substantial food supply stored for the spring months is key when it emerges from hibernation with a raging hangry face.
When is it likely to occur?
- Spring and Summer seasons.
How can it be mitigated?
- Move quickly, carefully and efficiently along the path.
- Do not feed the squirrels or chipmunks – it may teach them to associate humans with food.
- Do not throw poké balls at squirrels or chipmunks – it will only increase their curiosity.
- Do not leave food unattended – the squirrels will make it their own.
| Permit | Cost | Dates Required |
|---|---|---|
| Wilderness Permit | Free | 5/27 – 10/31 |
| Recreation Pass | Varies | 5/1 – 9/30 |
Wilderness Permit
- Required? From 5/27 through 10/31.
- Cost: Free.
- Use: This is a general form stating the people in your party, planned route, climbing dates and emergency contact info. However, if you don’t come back on your stated date, don’t depend on this form to initiate a search for you.
- Where to acquire: In-person, self-register at Devils Lake-South Sister trailhead.
Recreation Pass
- Required? From 5/1 through 9/30.
- Cost: Varies – $5 for a day pass, $30 for an annual pass. For details, see ‘where to acquire’.
- Use: Required for parking at Devils Lake Camping area.
- Where to acquire: USDA.gov – Recreation Passes & Permits


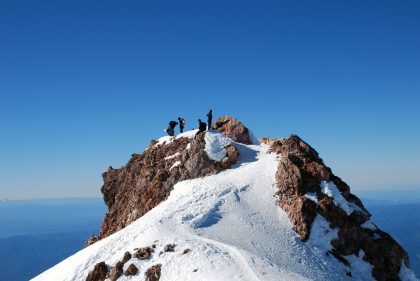
South Sister, like Mt. St. Helens, is a popular climb for both beginners and experienced mountaineers. Although strenuous, this non-technical climb is suitable for people in good physical condition who are comfortable scrambling on steep, rugged terrain.
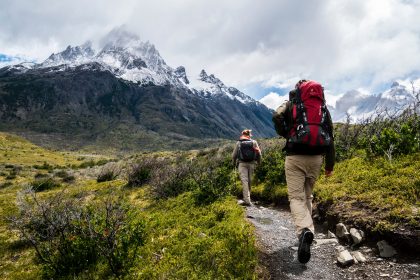
Because climbing is a physically demanding activity many people will train to climb South Sister by going on several training hikes. Training hikes should consist of elevation gains of 3,000-5,000 feet and distances of 2-4 miles to simulate the slope of South Sister. In Portland, locally these are climbs such as Mount Defiance, Table Mountain, Dog Mountain, and Hamilton Mountain to name a few. Climbing other comparable mountains like Mt. St. Helens or Mt. McLoughlin will give you an idea of what it’s like to climb at elevation and on similar terrain. During these hikes, if possible, carry the equipment you will climb with. If you do not own all the equipment you will need, put other items in to simulate weight. A pack of 5-15 pounds is average for a South Sister day climb and 30 – 40 pounds for an overnight trip.
A person who exercises regularly and is in good physical health should plan on doing 4-6 of these sorts of hikes before a climb. Those who do not get regular exercise or have other health problems should consult their doctor for an exercise routine appropriate for them, and slowly add in hikes with elevation and a weighted pack.
Winter conditions transform the mountain from a rock scramble to a more traditional snow traverse. When climbing on snow every climber should be trained and practiced in self arrest and crampon techniques. These are skills you will need for a winter climb of South Sister. It is also important that each climber is familiar with other skills that conditions may require, for example: avalanche condition assessment, avalanche transceiver use, first aid and navigation. Be prepared with layered clothing to withstand sub-freezing temperatures and high winds at elevation during a winter climber. Remember that the safety of every climber on the mountain is at risk whenever a single climber is unprepared.

The Route – via Devils Lake
South Sister Climber Trail #36, starting from Devils Lake Campground, is the most popular climbing route on the south side of South Sister. The roughly 5,000′ of elevation gain is fairly consistent over 6 miles of mixed rock, gravel, and snow. It can be done as a day trip or extended out over the course of 1-2 nights.
Ascent

A relaxed schedule for a summer climb of South Sister for out of town climbers looking for a multi-day trip might look like this:
- Day 1 – 5:00 PM – Arrive at Devils Lake Recreation Site (5,485′).
- Check in, organize gear and use the restroom.
- Day 1 – 5:30 PM – Depart the parking area.
- Day 1 – 6:45 PM – Arrive at Moraine Lake (6,458’).
- Setup camp, eat dinner.
- Day 2 – 6:30 AM – Wake up and eat breakfast.
- Check weather and visibility.
- If either is poor consider waiting for better conditions, or turning around.
- Day 2 – 7:30 AM – Depart Moraine Lake.
- Day 2 – 10:00 AM – Arrive at Lewis Glacier Lake (8,860′).
- Enjoy the views, eat a snack, take a drink, and capture some photos.
- Day 2 – 11:45 AM – Arrive at edge of Teardrop Pool (10,200′).
- Day 2 – 12:15 PM – Summit (10,358′).
- Day 2 – 12:45 PM – Begin descent.
- Day 2 – 2:45 PM – Arrive back at Moraine Lake.
- Consider camping another night, or returning to Devils Lake.
- Day 3 – 8:30 AM – Wake up and depart Moraine Lake.
- Day 3 – 9:30 AM – Arrive back at Devils Lake.
South Sister climbs can take between 10 – 12 hours round trip, depending on your schedule. Most climbers want to be done in a day and that means leaving in the early morning and returning in the late afternoon. Typically climbers leave the trailhead between 6am and 7am. Someone who has prepared properly to climb can average 1,000 vertical feet per hour, at that rate it will take about 5 hours to summit and between 3-4 hours to descend.
A start time should be established based on an estimated pace and your desired summit hour. Summit times are flexible if there is little to no snow at the higher elevations, however if there is significant accumulation be prepared for a slushy descent in the afternoon hours. Climbers who are in good shape and have trained to climb South Sister can estimate 4-6 hours to summit. Other climbers should prepare for a longer climb, maybe 6 – 8 hours.
The trailhead is well marked and the trail up is distinct and includes some signage. However, if you are unsure of where to go play it safe and follow others or pay close attention to the worn path. The south climb route sees a lot of activity which means there will be opportunities to talk to other climbers to get your bearings. In conditions with poor visibility or a freshly snow covered trail you should consider using a GPS or map and compass to ensure that you are on the right course. White out conditions can cause you to lose your bearings quickly if you’re not careful.
The terrain can vary – From the lushly forested dirt path at the trailhead to the rock, dirt and skree traverse which begins after Moraine Lake to the leftover snow and ice near the summit in the middle of summer. While on the other end of the spectrum the trail can be buried in snow and ice in the early spring and late fall months. Climbers should evaluate what conditions will be like prior to their climb and bring the appropriate gear. As many experienced climbers will attest there is a stark difference between scrambling on rock and climbing on snow. During Spring and Fall you may need to be prepared for both.
Descent

Descending from the summit back to the trailhead will take you approximately half the time it took you to summit. If you reached the summit in 6 hours it may take you 3-4 hours to get back. Descending is a challenge in and of itself though. You will be tired, and using a whole new set of muscles, and if the trail is composed of skree and rock progress can be slow. South Sister has a large boulder field just below the non-teardrop pool area at 8,800′ which tends to slow down progress. But gravity is on your side, and there will be far fewer breaks.
Generally you should descend the route that you came up. Under good conditions the path back will have been paved by the foot steps of other climbers. In situations where visibility is low or fresh snow begins falling it’s always a good idea to have a backup method for navigation, such as a GPS device or map and compass as well as knowledge on how to use both.

South Sister can be climbed most of the year depending on your chosen route and weather. However, climbers looking for the best window to summit should plan on climbing from May to September. Picking a date to climb all depends on your preference and risk tolerance. Questions to ask yourself:
- Do you want to climb on rock or snow?
- Do you want isolation or a more populated climbing route?
- Do you want to carry more or less gear during the climb?
- Are you prepared for hot/cold, wet/dry or clear/cloudy weather?
There are currently no climbing or camping permit quotas in effect for the South Climb route, but there are discussions around putting them in place due to increasing foot traffic in the area as early as 2020.
Average Temperature (°F)
Source for maximum and minimum temperature data came from NOAA data sets and represents relative summit temperatures at 10,358′.
Average Precipitation (in.)
Source for precipitation data came from WeatherForYou.com and was collected in the Three Sisters Wilderness at Lat: 44.08N, Lon: 121.95W. Source for snow depth data comes from the NRCS National Water and Climate Center.
Guided climbs of South Sister are offered through Timberline Mountain Guides and are available between May and September.

Lodging
The nearby city of Bend, OR is only 40 minutes drive from the South Sister trailhead and has an abundance of lodging options from AirBnBs to hotels and cabins.
Camping
Many local climbers may opt to climb South Sister in a day, but some climbers choose to camp at either the Devils Lake Campground or Moraine Lake. Be aware that camp spots are limited and availability is on a first come, first served basis.
If camping areas are full, no worries. Three Sisters Wilderness has many camping opportunities that are only 5-10 minutes drive from these climbing start locations. Many open camping spots are located off of Cascade Lakes National Scenic Byway, including Soda Creek Campground, Quinn Meadow Horse Camp, Elk Lake Campground, and Point Campground, among others.

Road closures are the biggest concern to lookup when planning a trip to South Sister. The Cascade Lake National Scenic Byway is the only highway in and out of the south side of the Three Sisters Wilderness area.
You may need to adjust the driving route depending on your exact start location and intended trailhead. Climber’s Bivouac is the most common start location, but in the winter the end point may need to be set to Marble Mountain Sno-park.
Lewis River Road (Rd 90) and NF-83 are generally open year-round, but the road to Climber’s Bivouac may become gated off during the winter months. The section of NF-83 just past Marble Mountain Sno-Park is usually gated when heavy snow arrives in the area. Always check Current Conditions before heading out on a trip.
| Required | Recommended | Optional |
|---|---|---|
| Clothing | Gaiters | Overnight Gear |
| Food | Trekking Poles | Stove |
| Water | Sun Protection | Blue Bags |
| Navigation | Mobile Device | Shovel |
| First Aid Kit | Crampons | Helmet |
| Ice Axe | Avalanche Recovery Gear | |
| Head Lamp |
Required versus recommended gear selections are based on a well-rounded approach to mountaineering on South Sister that aims for the least amount of risk and while maintaining minimal weight. You should always evaluate what gear to bring based on current conditions and your overall risk comfort level.
Clothing

An improper clothing strategy on South Sister can mean at best – sun burnt extremities; at worst – limb devouring frost bite. The wide range of temperature, precipitation, and sun exposure should determine your clothing strategy on the day of the climb.
The best approach for South Sister is the 3-layer system: Base-layer, mid-layer, shell. Do not wear cotton – All layers should be either synthetic, wool, or another breathable material.
Base-layer – Top and Bottom – This can best be defined as a long-sleeve compression shirt and synthetic leggings
. Your base layer should allow for a great range of mobility, moisture wicking, fast-drying, and temperature balancing characteristics.
Mid-layer – Top and Bottom – Also known as the soft shell layer, this is the layer you should be able to climb in under ideal weather conditions. Similar to the base layer these items should maintain optimal breath-ability, heat/moisture dissipation, and retain adequate warmth. For example, I really appreciate the versatility of Mountain Hardwear’s hooded jackets combined with Prana’s stretch zion hiking pants.
Shell – Top and Bottom – This is the layer you put over everything else. While it may not provide much insulation, its primary purpose is to keep wind, rain, sleet, snow, ice, and any other undesirable elements away from your underlying layers. An affordable shell layer might be a Black Diamond shell jacket and O’Neill Hammer snow pants
. A shell layer with more advanced, light-weight, protective materials might be the Arc’teryx Beta AR jacket
and Mountain Hardware Torsun pants
.
Insulation – (Winter only) – This is your deep cold layer and is typically only required for a winter climb. It comes in to play when conditions start getting chilly or you are not moving enough to maintain a comfortable body temperature. This is typically a down jacket (aka the puffy jacket). We personally like and have used the Black Diamond Cold Forge Parka and the Arc’teryx Thorium SV hoody.
Gloves / mittens – Durable gloves are recommended when climbing on exposed rock. When it’s colder we like to use a fleece glove or liner. In the winter these can be paired with a deep cold mitten. In most conditions you will find that your hands retain quite a bit of warmth with a decent fleece glove and that the mittens function as a great backup for when the wind picks up or the weather degrades. Why mittens? Because by not separating your fingers from one another in a traditional glove they stay warmer by sharing their heat. The REI fleece grip gloves paired with the basic cold weather mitten are a fantastic combination in most conditions. A similar combo is offered by Outdoor Research with their fleece gloves and Meteor mitts
.
Hats – Not just for staying warm, a good hat will protect your head from the sun. In the Spring and Summer you can save your skin from burning by wearing a sun hat. For cold weather, wool beanies or other insulated head gear is the recommended choice.
Balaclava – Not to be confused with the Greek dessert (baklava), a balaclava is like a ski mask which protects the exposed parts of your face to the elements. You would be surprised at how much of an improvement even an inexpensive balaclava will make in cold or windy conditions.
Boots – A quality pair of boots can make or break a successful summit attempt. Considering the amount of abuse that your feet will experience on this climb, selecting a boot that is both comfortable and supportive is crucial. We’re huge fans of Columbia’s medium-duty hiking boots for 90% of the trails out there. For the other 10% of the time where a dedicated climbing boot is needed La Sportiva makes a great line of boots. if you are packing crampons you will also need a boot which is compatible with your chosen style of crampons.
Socks – Arguably one of the most important selections behind boots. Your feet will be taking a beating during the climb and ensuring that they stay warm, dry and comfortable is a primary factor in having a successful summit. Long wool socks are highly recommended.
Eye protection – Mainly for the sun, but depending on the wind speed having a decent pair of ski goggles to protect your vision can help you focus on the path ahead. On clear, sunny days having a sturdy pair of polarized sun glasses can prevent damages to your eyes and also prevent snow blindness in the winter.
Food

Eat before, during, and after the climb. Load up on fats and proteins before the climb as these metabolize more slowly and will give you energy for a longer period.
During the climb snack every 20-30 minutes on high carbohydrate foods as these metabolize faster and give you quick bursts of energy. Eating at least one or two snacks per hour avoids large spikes in energy and helps maintain smooth, consistent energy levels. Keep in mind, roughly 50-100 calories can be burned every 15 minutes depending on your base metabolic rate, speed, grade, and air temperature. In the winter, the body will burn additional calories just trying to stay warm. For a 9 hour climb that’s somewhere between 1800 – 3600 calories. That’s the equivalent of between 8 – 17 regular sized Snickers bars, which apparently you can buy in bulk.
It’s also important to be aware that your taste buds may change as you gain elevation. Furthermore, altitude sickness may actually suppress appetite. In other words, if you only sort of liked a food at base elevation you’re probably not going to like it at high elevation. So bring foods that you know you’ll enjoy. I like sour gummy worms for high elevation expeditions.
After the climb, have a burger, sandwich or something high in fats and protein which helps muscles recover from lots of exercise. Remember your metabolism keeps going for an hour or two after you stop, so that’s the time to binge a little.
Water

Science recommends 1 liter of water be consumed for every hour of high energy activity. For a south side climb that would be 8 – 12 liters (or 2 – 3 gallons), which is the equivalent of 27 – 40 pounds of weight on top of all the other gear you would be carrying!
For most folks it will not be realistic to carry all of this water with you for the entire trip. And, similar to food, we recommend the before/during/after strategy. Drink 2-4 liters of water a few hours before you start your climb to saturate your body and reach your muscles. For the actual climb, bring 2-4 liters of water to sip on constantly. After the climb, have a gallon of water waiting in the car to replenish your reserves.
There are a few different ways of transporting and retaining a clean supply of water. A bladder makes constant hydration easier and can be combined with an inline water filter when refilling at a stream or lake is an option. If you do use a bladder, blow water back into the bladder to help prevent the hose from freezing during cold weather or use an insulated hose. Another option would be to have a hybrid water bottle and bladder system in case the bladder freezes.
Another light-weight option is the Survivor Filter collapsible canteens due to their light-weight and compact size when not full. These can be combined with the Survivor Filter water straw for a quick filtration solution which screws on to the top of their canteens.
The tried and true day hiker method is to carry CamelBak water bottles. Due to their sturdy design they are the most durable solution. If camping overnight, Camelbak bottles also offer a usable container for storing melted snow water or other liquids.
Navigation

Weather can change rapidly and white out conditions can descend on the mountain much quicker than you can climb down. Having and knowing how to use a map, compass, and altimeter can keep you on course.
Whether you’re climbing in the summer or in the winter having the tools to navigate to and from the summit is a must. Coming down can present a navigation challenge – especially in winter when there is fresh snow, but can also be difficult in the spring/summer since your perspective on the trail has changed from when you were ascending. Having a GPS with way points enables ‘easy mode’ in case you are feeling navigationally challenged.
There are several free navigation apps available: Compass (built in to iOS), Google Maps (with downloaded maps ahead of time), AllTrails (pre-download route maps ahead of time), ViewRanger, Avenza Maps, Gaia GPS – set your phone to airplane mode, it can still use the built-in GPS and track your movement in these apps.
First Aid Kit

Each climber should carry a medical kit from which they can dispense first aid to themselves or another climber, but you should never depend on another climber to be able to patch you up. Adventure Medical sells a great, light-weight kit that we bring on every outdoor trip.
Head Lamp
If you are night climbing or camping overnight a headlamp turns your face into a source of illumination that lets your hands perform the types of tasks that hands are great at doing. You can’t go wrong with the rechargeable Black Diamond Revolt headlamp.
Gaiters
Gaiters cover the vulnerable tops of your footwear to fully protect your feet and lower legs from the snow, water, dirt and rocks that have a way of sneaking into even the best boots. While not strictly required for South Sister they can come in handy on the mountain in deep snow or in sections with a lot of loose scree. Even a less expensive product like the Moutain Hardware High Gaiter offers superb protection in most conditions.
Trekking Poles

As we’ve lamented on other trips, trekking poles are extremely advantageous to have, especially on mountains. They do more than just provide stability. Trekking poles actually transfer load away from your legs. This is most noticeable on downhill sections where your knees are most likely to take a beating. An affordable pair of trekking poles will do the trick, however if you’re feeling the need to go ultra-light Black Diamond makes a carbon fiber trekking pole
. We like and have used both, but the Black Diamond product is mind-bendingly light and strong.
Sun Protection

At elevation there is less atmosphere to protect your skin from the sun’s harmful radiation. Combine this with the reflective properties of snow and you can get a fairly severe sunburn without the proper protection. Having a strong sun screen (SPF 40+) or a hat that shades your neck, face, and ears can prevent this. It’s also easy to forget that your lips need protection too. Having lip balm with an SPF rating can go a long way to avoiding puffy, sun-burned lips. Wear sun glasses to protect your eyes as soon as the sun rises.
Mobile Device
Most people carry their cell phones when they climb so that they can snap photos of their adventure, but these devices can also serve as locators for lost climbers. In the days prior to wireless phone technology it was common to purchase or rent an avalanche transceiver or mountain locator unit (MLU) which could be used to locate a person in the event of an avalanche. More advanced devices like RECCO reflectors, PLBs, and SPOTS are now available which use GPS and two-way satellite communication to provide emergency personnel with more accurate information about your location.
Additional information about the advantages and disadvantages of these devices is available here.
Crampons
Crampons allow you to grip into solid snow and ice providing stability and traction when you need it most. They are only truly needed when traction on ice and snow is required.
There are several types of crampons available on the market, but the key is matching the correct crampon binding system to your boot. In fact, REI has a great article describing how to choose the best crampons for your goals.
We highly recommend the Hillsound micro-spikes/trail crampon for icy conditions requiring added traction. These micro-spikes offer 80% of the functionality needed for greatly improving traction on snow and ice when the incline isn’t significant. They attach easily to any hiking boot and stay secure.
For full crampons, one pairing that we’ve had a lot of success with is the La Sportiva Trango boot and Grivel G-12 new-matic
crampons. Grivel’s new-matic system has a locking point in the rear and straps in the front to ensure a secure fit to this style of boot.
Ice Axe
Acquiring and carrying an ice axe is easy, but knowing how to use it requires skill, familiarity and practice in the art of self arrest. The main climbing route on South Sister is not technical so we recommend a straight (or slightly curved) handled axe.
When choosing the length of an axe, stand up straight and hold the axe by your side grasping its head between your fingers. The spike (bottom) of the axe should rest by your ankle. A longer axe might be nice as the south side route is relatively low angle. A shorter axe will require you to bend over to place it, a tiring endeavor. Also, a shorter axe may seem lighter but the difference is usually only an ounce or two. If using a shorter axe or ice tool look into a trekking pole for the other hand.
Your ice axe may come with a leash. This is important in case you do go in to a fall and the ice axe leaves your hand. A leash keeps the ice axe attached to your person either on your wrist or climbing harness allowing you to reel it in and perform a self arrest.
Overnight Gear

While many people plan a climb of South Sister as a day trip, it is possible to turn it into an overnight expedition.
Tent / Shelter – In the winter a four season tent is recommended, however in good weather conditions a three season tent or hammock will work. Despite it’s weight, we recommend the ALPS Mountaineering Tasmanian 3-Person Tent for it’s affordability while providing excellent protection on alpine terrain.
Sleeping Bag – A 0 – 20 degree bag will work under most conditions. The Marmot Sawtooth 15 degree sleeping bag is a great, lightweight down bag which provides significant warmth.
Sleeping Pad – Having an insulated sleeping pad is required in order to prevent your sleeping bag and body from being in contact with the cold, hard ground. Do not expect the tent floor to be sufficient thermal insulation even in a four season tent. The Therm-A-Rest ProLite sleeping pad does the job of giving you that extra insulating layer.
Stove
Portable stoves are useful for cooking warm meals and boiling water, but are invaluable in melting snow to replenish water supplies. Jetboil makes a great line of compact stove systems which we use on our trips.
Blue Bags
Blue bags are provided for free at the climber check-in. They are used for solid waste disposal.
Shovel
The primary reason for packing a light-weight shovel is to dig out other climbers in the event of an avalanche. If someone in your party gets buried you only have a matter of minutes to find and dig them out before chances of survival plummet dramatically.
The secondary reason is to be able to dig yourself a snow cave in the even that bad weather moves in suddenly and you find yourself trapped on the side of the mountain. Here is a great reasonably priced, durable, light-weight, component shovel which we use.
Helmet
A climbing helmet is not required on South Sister because there is less of a risk of less rock or ice breaking away above your head. The angle of the climbing slope is not as steep as Mt. Hood or Mt. Shasta But if you choose to wear one – your helmet should meet climbing certifications, meaning that it is rated for impact from above. Biking and ski helmets are not suitable substitutes as they are only rated for side impacts.
Avalanche Recovery Gear
Avalanches are less of a risk on South Sister than on other peaks in the area. But while snow safety and avalanche awareness can help reduce risk, climbers should carry specific items when the risk of an avalanche on South Sister is high:
- Avalanche beacon
– Each climber should be equipped with a beacon so that they can be discovered in the event of an avalanche. Many devices, like the Backcountry Access Tracker
- Avalanche probe
– Similar in design to a trekking or tent pole, an avalanche probe is used to poke the snow to discover where a buried climber or object might be.
- Shovel
– Carrying a light-weight utility shovel allows you to dig other climbers out if they become trapped in an avalanche. We like the Yukon Charlie sport utility shovel
- Avalanche backpack
– Like a regular backpack except these contain airbags that, when triggered, inflates the airbags and helps you float on top of the avalanche to greatly reduce the probability of being buried.

All climbers should have a plan in place for emergency situations. This includes a plan made with a friend or loved one who is NOT climbing, and a plan for the climber(s).
Friends/Family Plan: It is important that you leave an itinerary with a friend, family member or loved one who is not climbing. This way, should something happen and you are not able to initiate a search, rescuers will be alerted and a search will commence. This plan should include:
- The specific route you will take
- An alternate route in case of emergency
- Timetable for your climb
- A time when you will check in
- A time to initiate a search
- Contact information for Search and Rescue
- Contact information for family members of each climber
With this information in place, the individual you leave it with will know when to expect a phone call, when to worry, who to call and what to tell them. We recommend you pick a time you will check in with your friend/family member that is 1-3 hours after you plan on returning. This way you have flexibility for any delays. Your search initiation time should be 6-10 hours after you were suppose to check in. If you do use this kind of plan DO NOT FORGET TO CALL, even if you are off the mountain safely, call. If you are running late, call. If you blow off the climb and go to a bar, call.
Climber(s) Plan: Within your team, or as a solo climber, you must have a plan in case of emergency. It is impossible for us to go through every scenario, but you must work through some common problems and agree on the solutions before you leave. Questions you should consider are:
- What if a storm moves in?
- What if we get lost?
- What if we are behind schedule?
- What if the route conditions are questionable?
- What if someone is fatigued?
- What if someone is injured?
It is vital that every member of your group agree on an answer to these questions. During a climb, ego and adrenaline are high and decisions can be rash. Discuss possible scenarios before you leave and come to a consensus. These are problems best solved in the parking lot, or better yet the drive up. Of course, there are a million things that can happen in a million different ways. You must be able to asses the situation and make good judgements, often on the fly.
- Oregon.com – South Sister
- Wikipedia.org – Three Sisters
- USDA.gov – Three Sisters
- Summitpost.org – North Sister
- Glaciers.research.pdx.edu – Oregon
- USDA.gov – Devils Lake/South Sister Trailhead
- USDA.gov – Devils Lake Campground
- Oregon.gov – Mckenzie Highway 242 Status
- USDA.gov – Central Cascades Wilderness Strategies Project